Are you looking for a guide on how to use Streamlabs OBS to start streaming or creating content? Our guide is fully packed.
What Is Streamlabs OBS?
Streamlabs OBS is a free, fast, reliable, and feature-packed streaming application. It runs off the OBS (Open Broadcasting Software) engine with added features from Streamlabs. It comes with over 250+ free themes you can use to get started.
Were you using OBS or OBS Studio beforehand? No problem! Streamlabs OBS comes with an import feature that allows you to import your OBS settings into SLOBS easily.
If you are starting fresh, they also have a quick wizard that shows up when you first launch SLOBS that will get you up and running in about 5 minutes.
The company itself is an excellent choice if you want to brand yourself as they provide all the tools to do so. One of them allows you to create a custom domain and website through them.
They have some themes that match, meaning the look of your overlay in Streamlabs OBS can match the similar look and feel of your website. You can also open a store through them to sell merch, including clothing, headwear, stickers, home goods, etc.
What Are Some of the Features of Streamlabs Obs?
SLOBS has game-aware video encoding, which allows a better stream quality for the game you picked while keeping your system’s CPU performance in check.
If you are starting streaming, chances are you only have one monitor. It can be hard to keep up with your chat and interact with them.
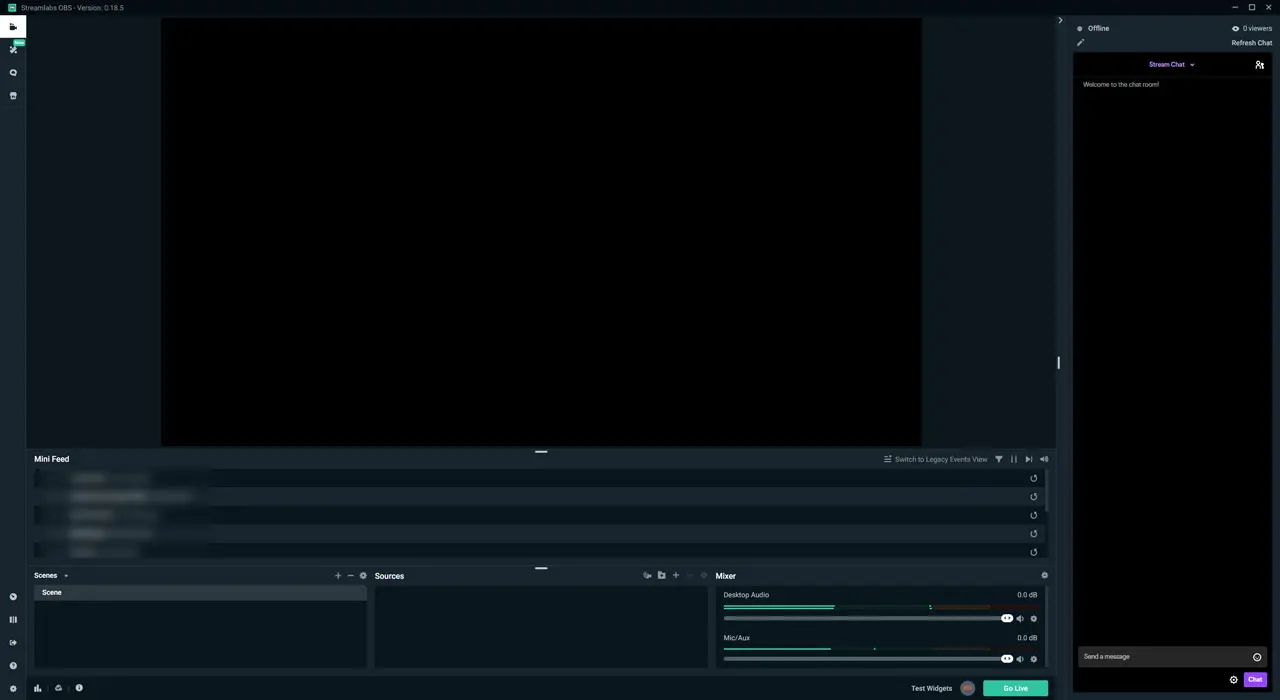
SLOBS comes with an In-Game Overlay so you can read your chat and events directly in-game. Now you can easily stay in touch with your community while gaming on one monitor.
Another neat feature is the 4-screens-in-1, which helps to reduce window/screen clutters. This feature combines all of your essential streaming windows, such as your chat, events, widgets, and SLOBS, into one view.
Furthermore, if your streaming and your recording your VODs at the same time, you can control your audio sources that go into your video to prevent copyright issues.
Streamlabs OBS has also released Selective Recording. It allows you to specify which sources are shown on stream and in your recording. We will cover this feature further in the guide.
How to Set up Streamlabs OBS
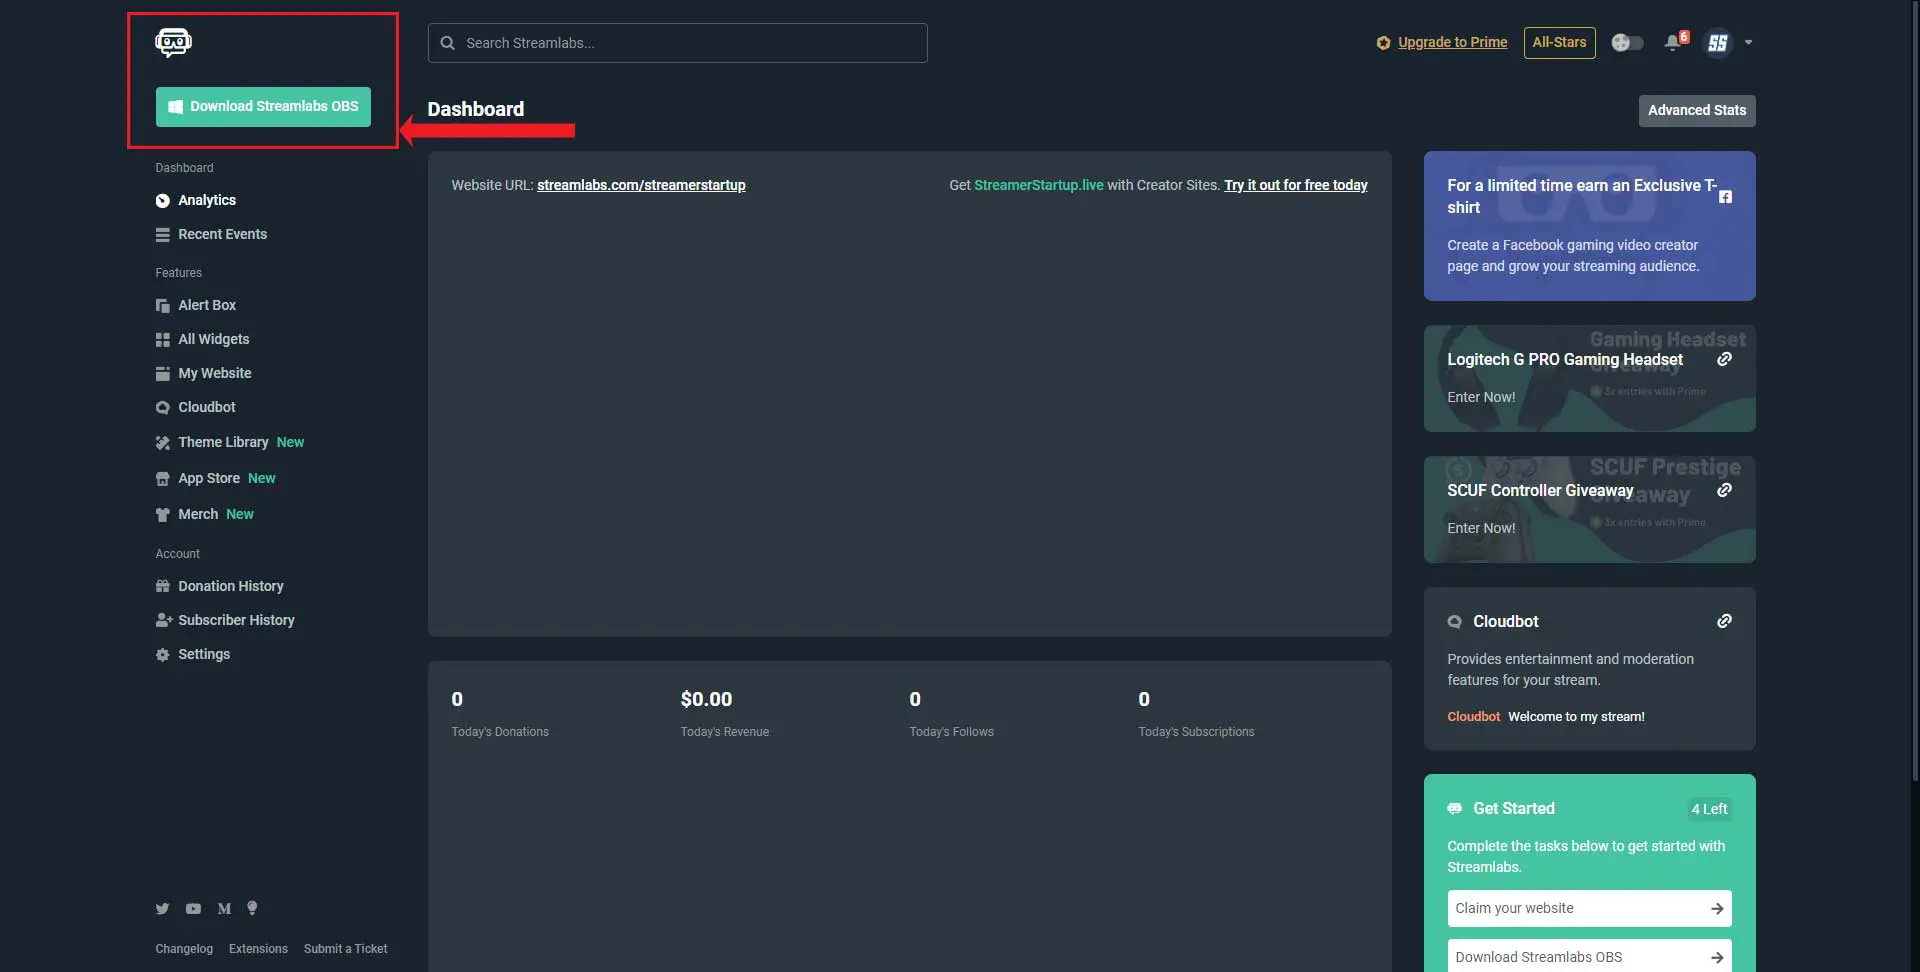
Now that we’ve gotten the nitty-gritty out of the way, you can head to the Streamlabs OBS website, log in with your platform and then download SLOBS for your system. Once completed, install the software.
You will get prompted to log in with your streaming platform credentials. It makes it easy for you by setting up your stream key automatically and getting all the back end information and stats for your account. All your data will be on your Streamlabs dashboard on the site.
Step 1 – Download Streamlabs OBS
Step 2 – Install Streamlabs OBS
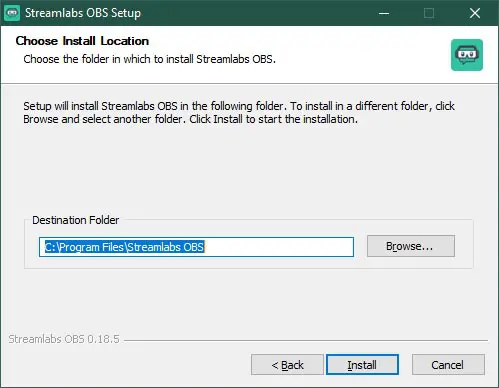
Step 3 – Start Streamlabs OBS

Streamlabs OBS And The Basics
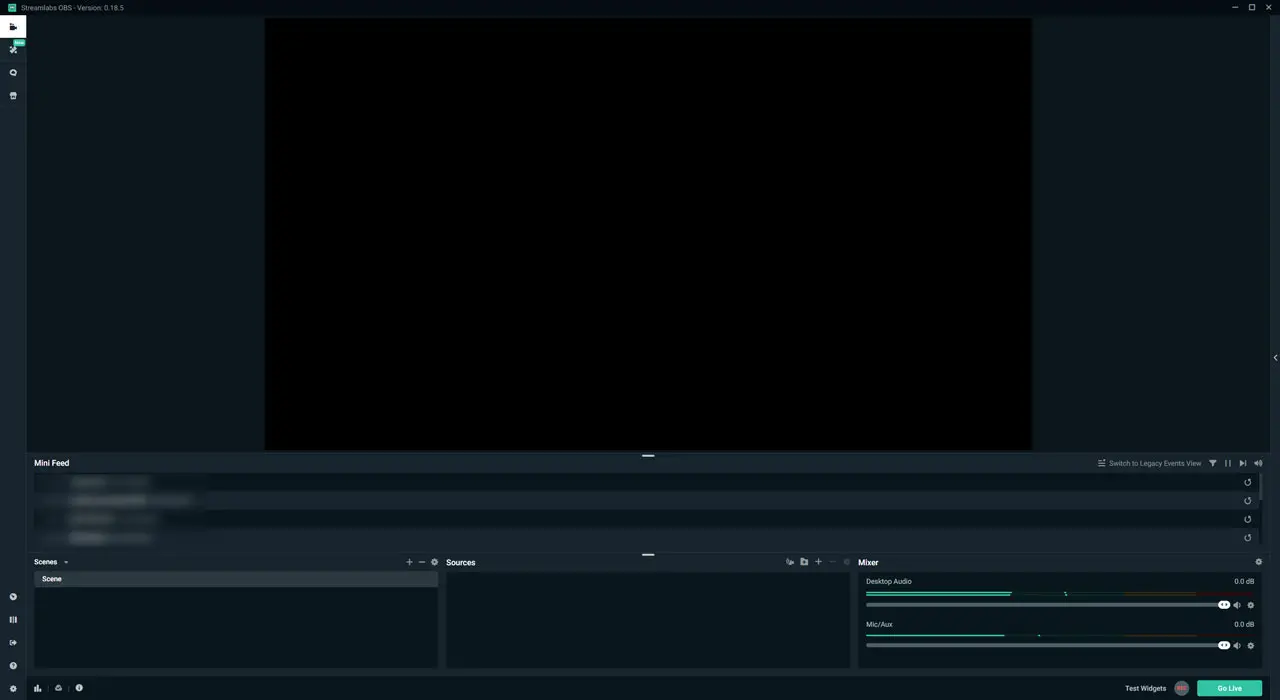
Now that you have Streamlabs OBS installed and opened, we can take a look at what we will be working with inside this program.
Preview
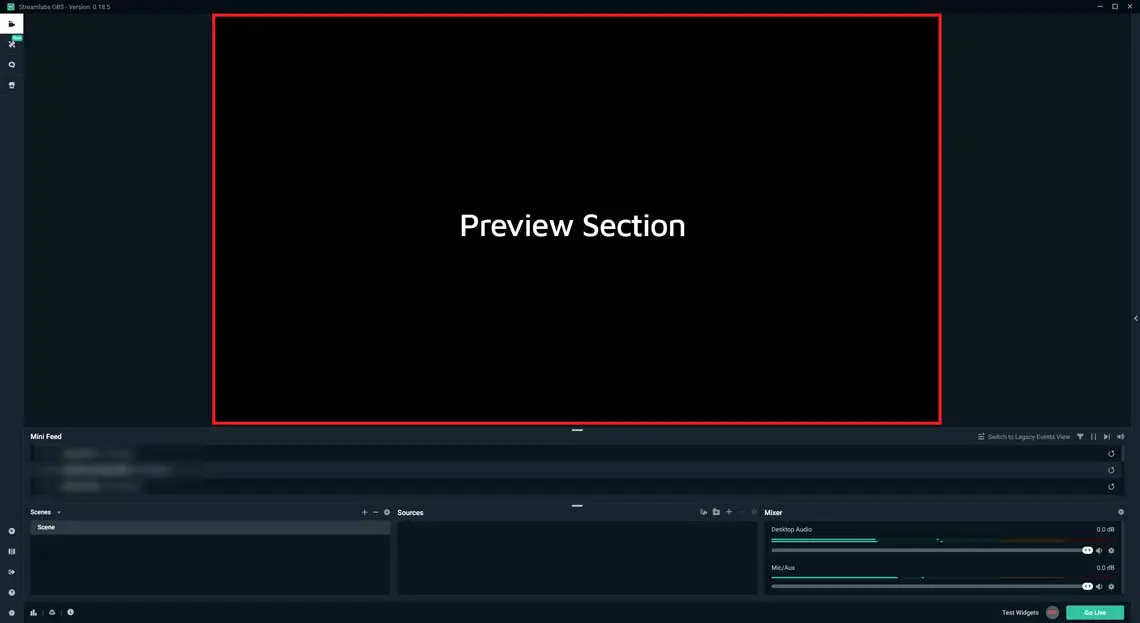 This section is called the preview section, and it is where you can see what is being broadcasted or recorded. This area allows you to customize what your viewers will see.
Scenes
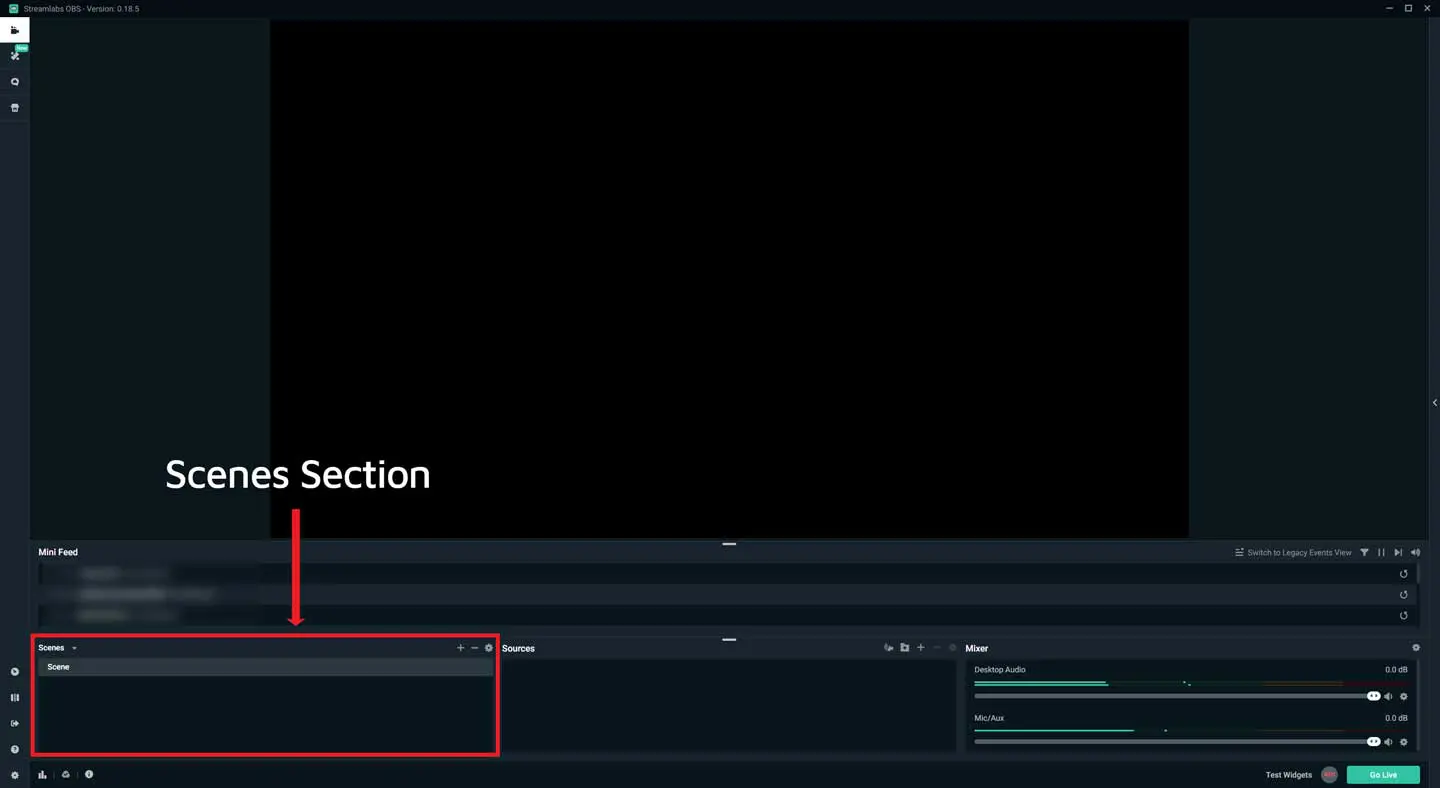 This section will allow you to manage your screen layouts. By changing which view is currently active, it will switch to that specific instance, and it will be what everyone sees.
Sources
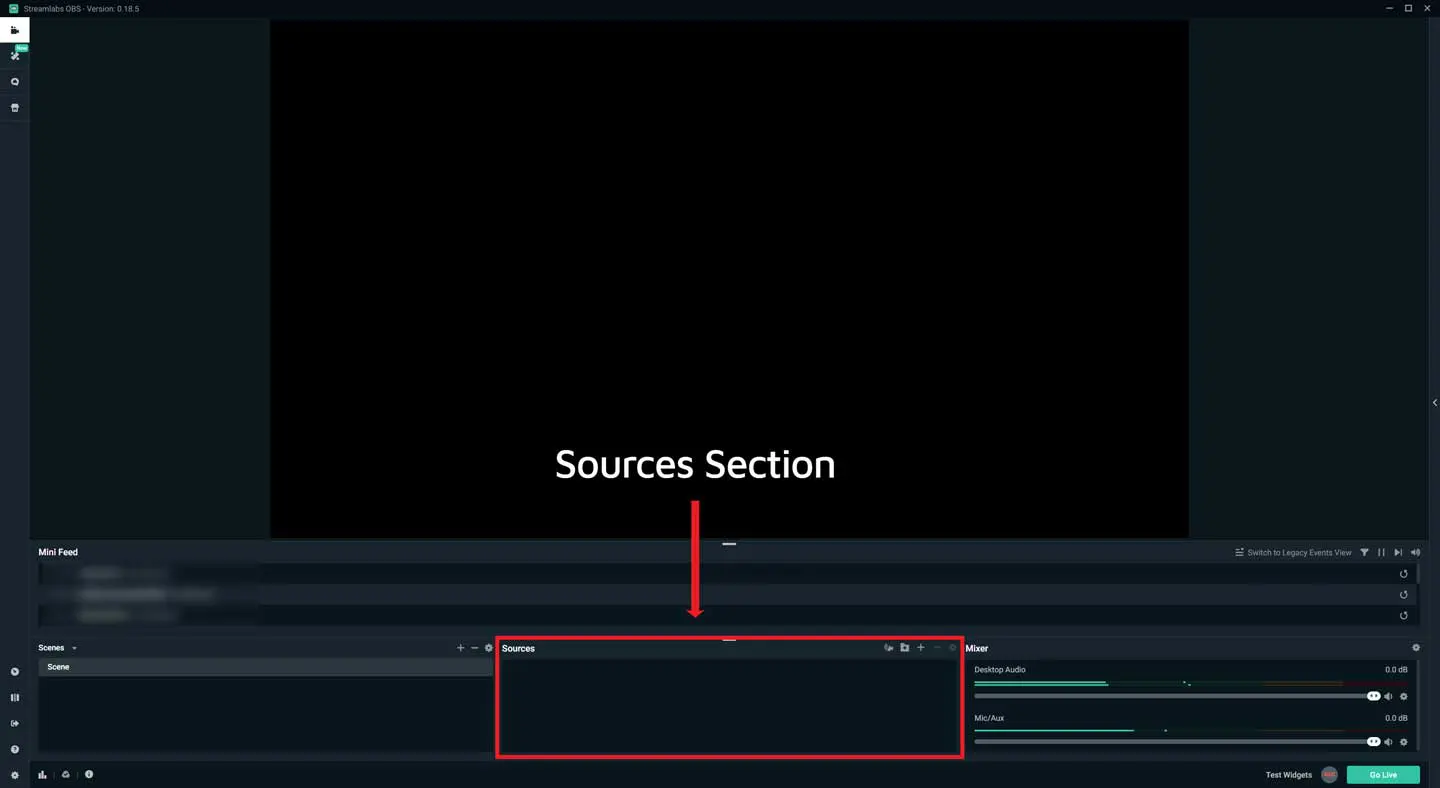 This section is where you will build or add to your layouts in the scenes you’ve created. This area allows you to add overlays, images, text, game capture, display capture, browser captures, media sources, etc. – pretty much anything you want the viewer to see.
Audio Mixer
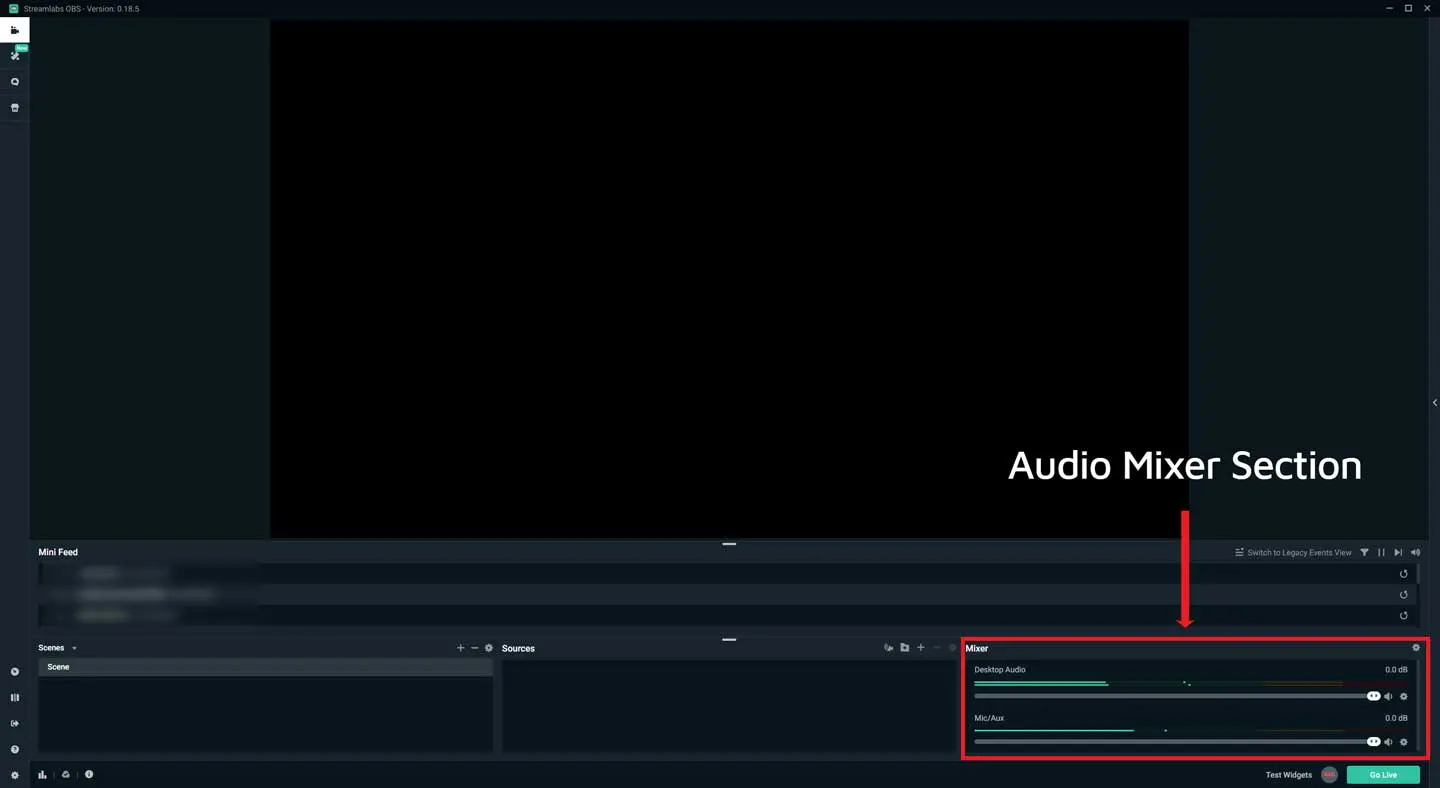 This section is where you can manage your audio coming in and going out. You can change the volume on your speakers/headphones and adjust your microphone. Make sure to go into the properties to select the proper outputs.
Controls
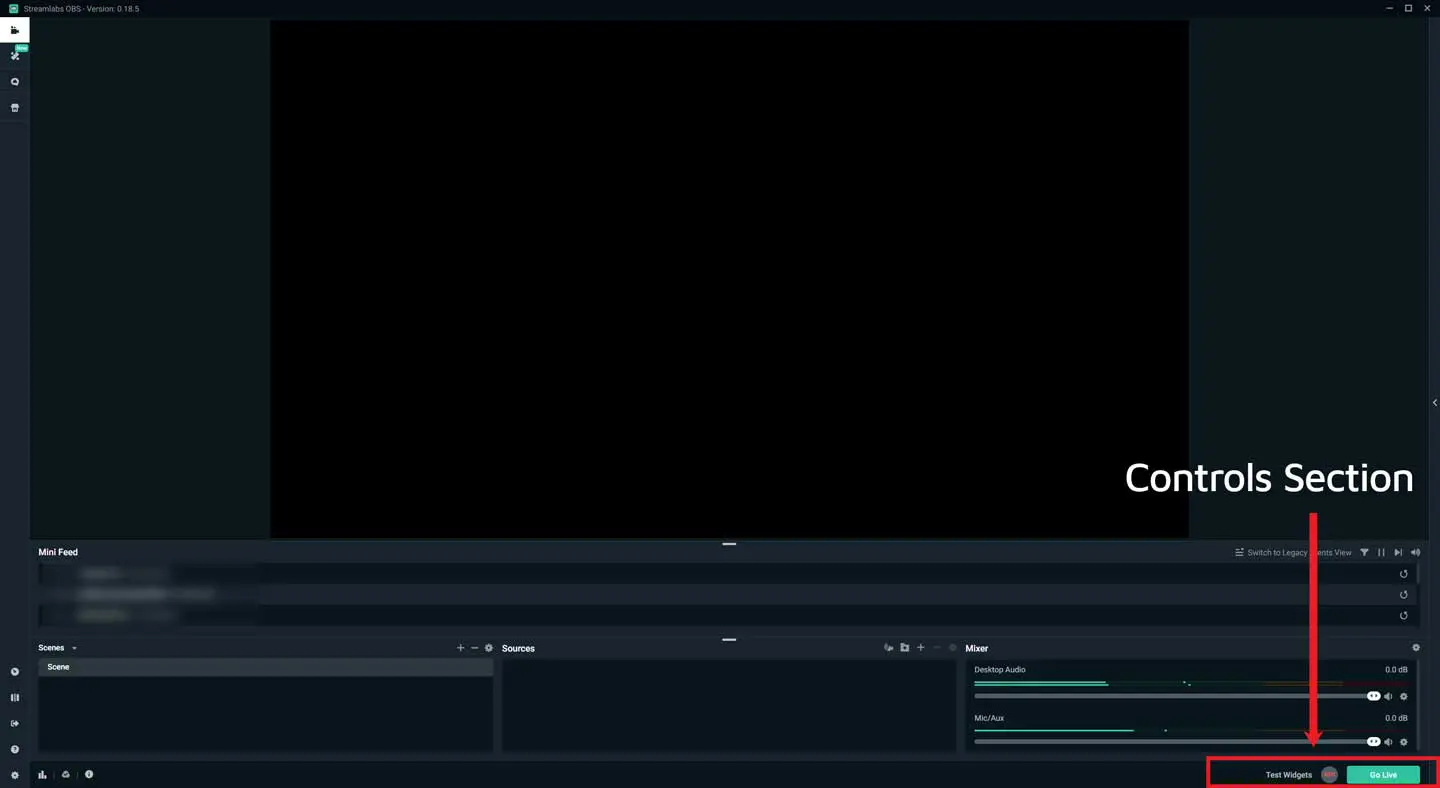 This section is possibly the most important one. It allows you to start streaming or to start recording your content for your viewers.
Streamlabs OBS Studio Mode
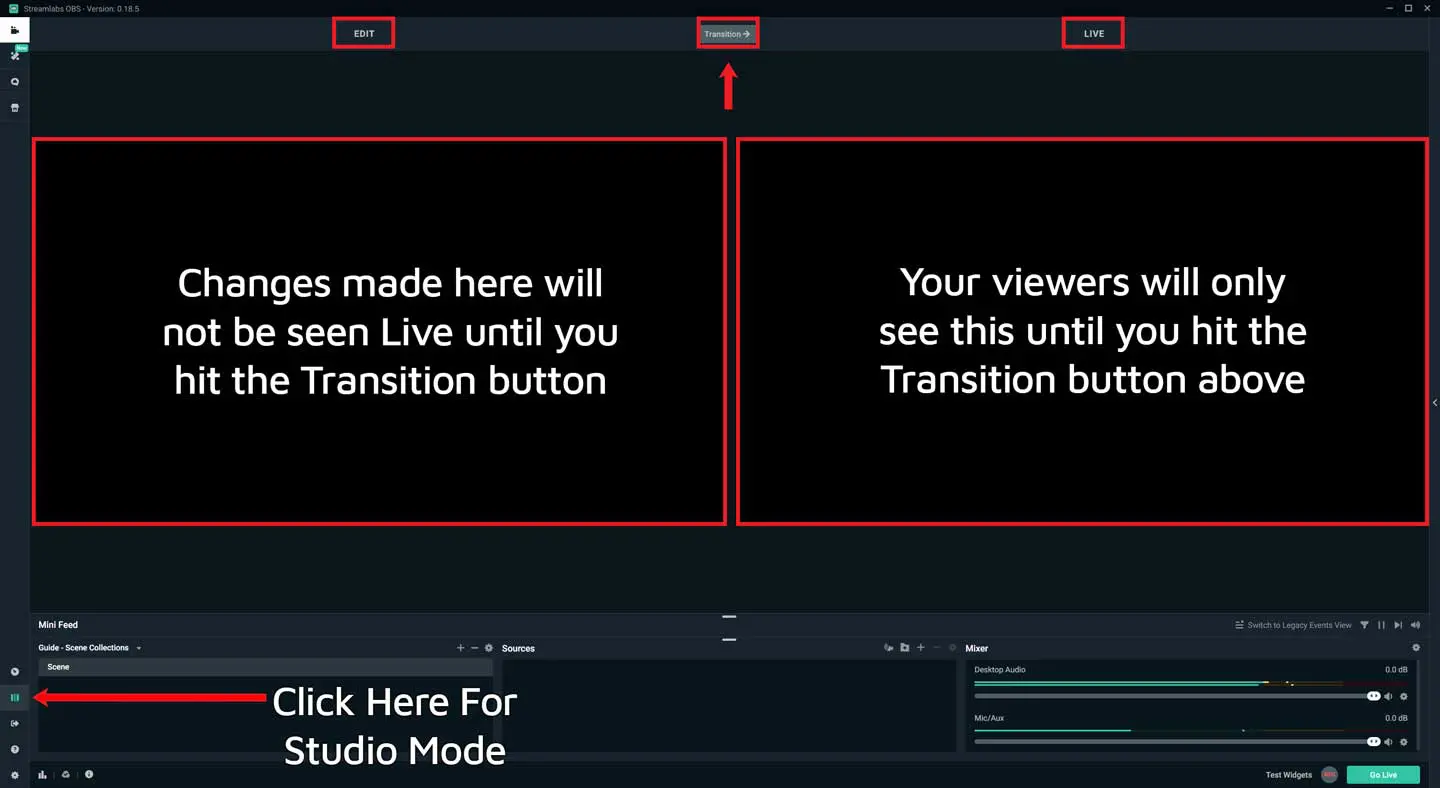
To make sure you don’t get any interruptions in your live stream, Streamlabs OBS has a Studio Mode, which allows you to make changes in a virtual space before implementing it live.
This feature prevents anyone from seeing the changes you do until you click the Transition button to update the live version of your output.
Streamlabs OBS Selective Recording
Selective Recording is a game-changer for content creators.
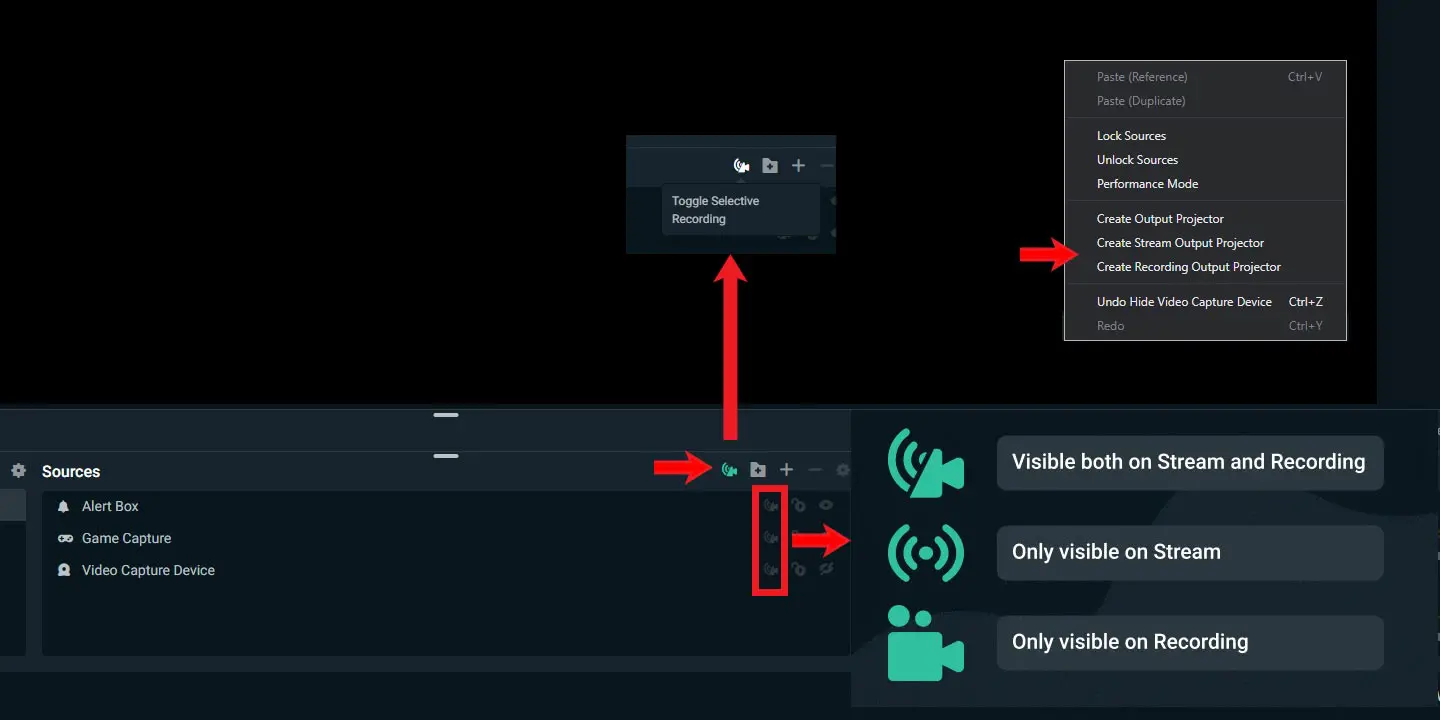
It allows you to record and stream two different outputs at the same time. You are now able to select which scene or sources that your viewers see and what your recorded content will display once it gets recorded.
For example, you can choose only to make notifications, alerts, and widgets show up on live stream and turn them off for your video recording.
To make sure Selective Recording is working, Right-Click on your Preview Section, and select either “Create Stream/Recording Output Projector” and will open up a new window and show you what you will see.
The Ease Of Use Of Streamlabs OBS Auto-Optimizer
Many people struggle with configuring settings such as bitrate, proper output resolution, canvas sizes, which video encoder to use, etc.
With Streamlabs OBS Auto-Optimizer, all that becomes less stressful as it configures those settings automatically for you. The settings are set based on your answers to the prompts given by the wizard.
You can configure your settings manually by clicking the Settings cog at the bottom left of your software to bring up the Settings window. You can make it easy on yourself, especially if this is your first time using the software and use the Run Auto-Optimizer feature found under the General menu.
Those of you who have likely already tinkered with the optimizer and found no success, I will list other guides for optimal settings at the bottom of this guide. What I am looking for is getting people streaming right away. Then they can look into tweaking their settings to get the desired results they want.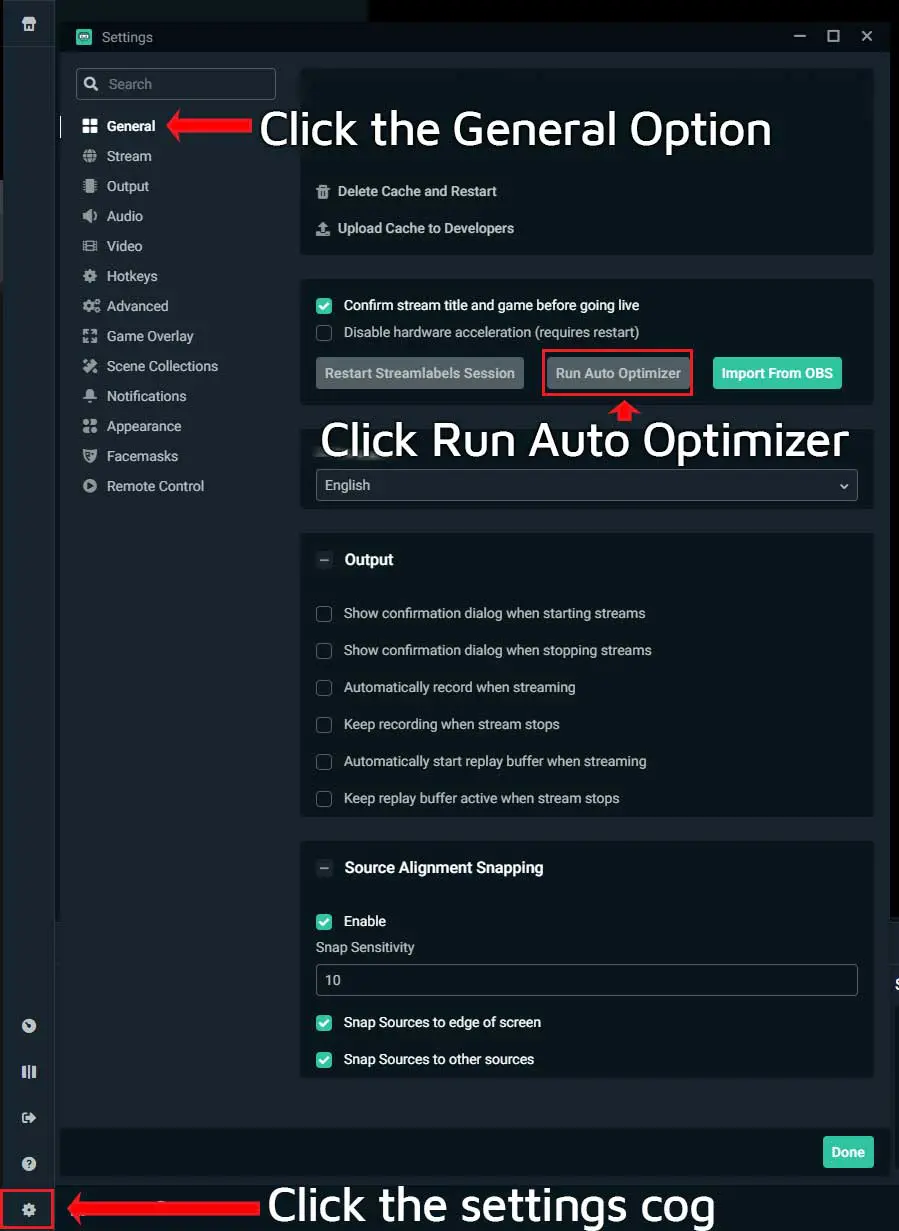 Before we begin, I have written up a couple of guides on retrieving your stream key from some of the most known streaming services out there.
You can find them in the guides below.
You would enter this key under the Stream menu in the Settings window.
Streamlabs OBS Auto-Optimizer Walkthrough
The Auto-Optimizer Wizard is typically good enough to get your settings close to optimal for you to start streaming. The wizard is not always full-proof, and you will likely need to tweak your settings manually later on once you start streaming.
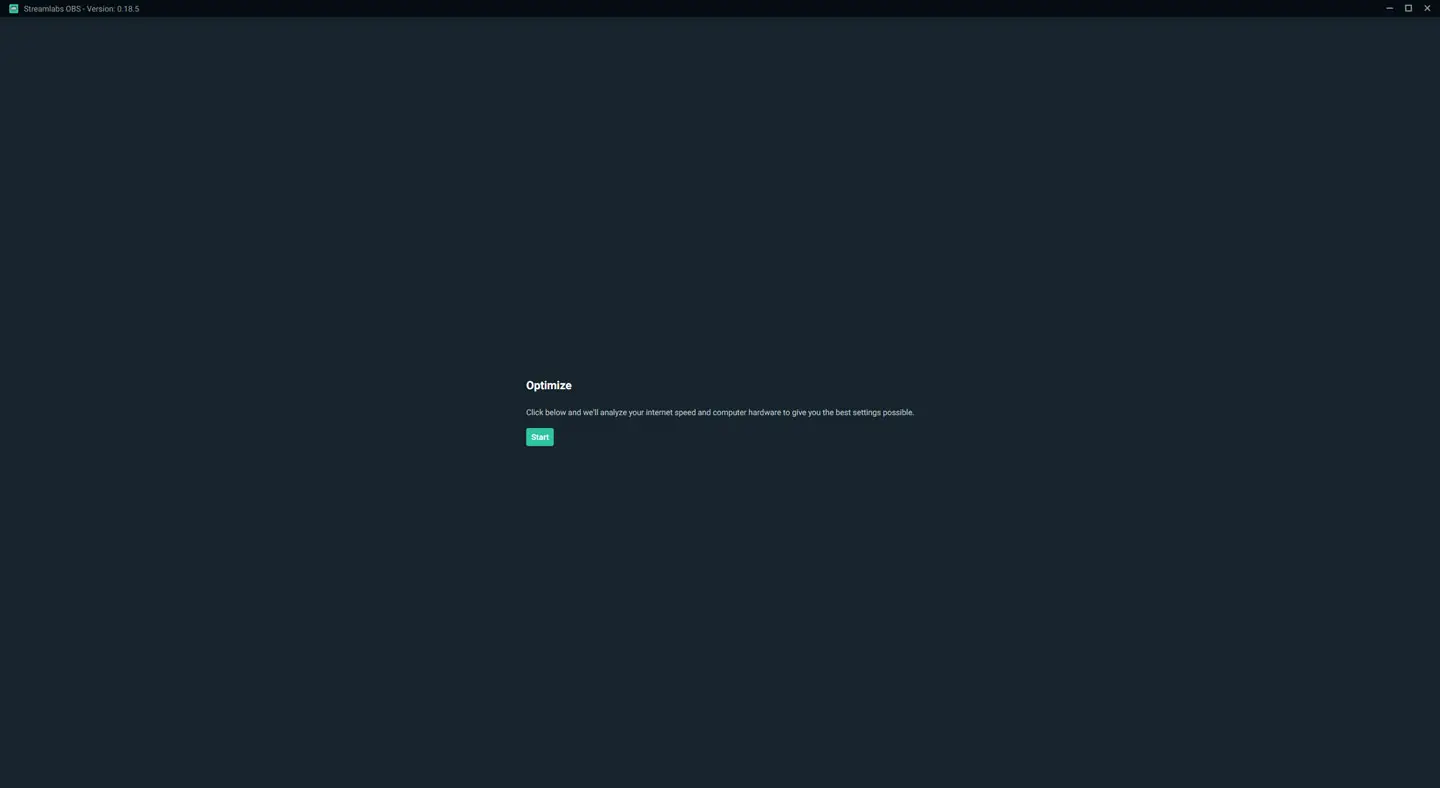
Step 1 – Start the Auto-Optimizer
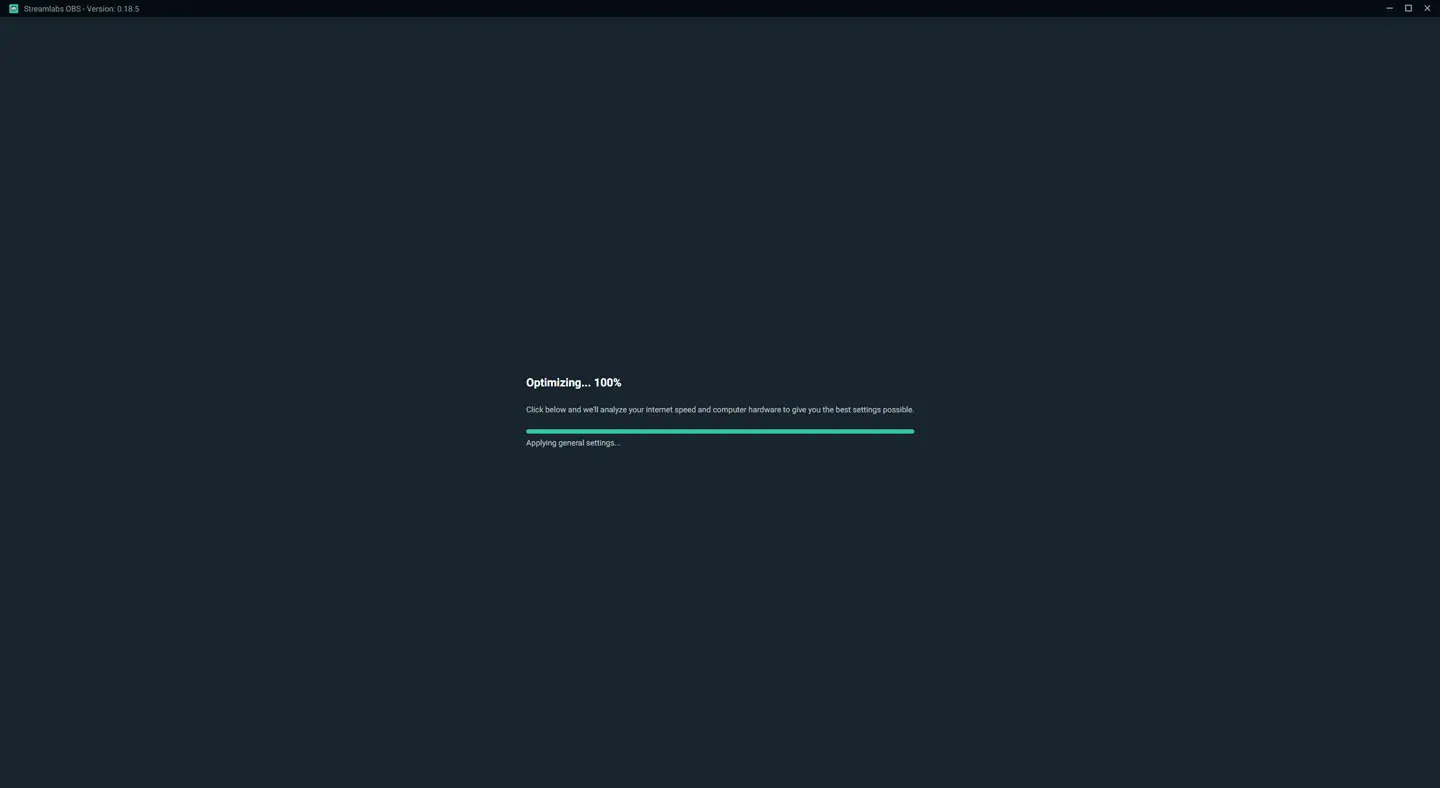
Step 2 – Wait Until It Finishes
Creating Scenes In Streamlabs OBS
Think of scenes as screen layouts. Now to make things more interesting for your viewers, you should have more than one and have good transitions between them. Typically, the average streamer will have at least the following scenes:
1) Stream Starting Scene
2) Intermission Scene (Usually has webcam/chat in it)
3) Game scene (don’t forget this one!)
4) Stream Ending Scene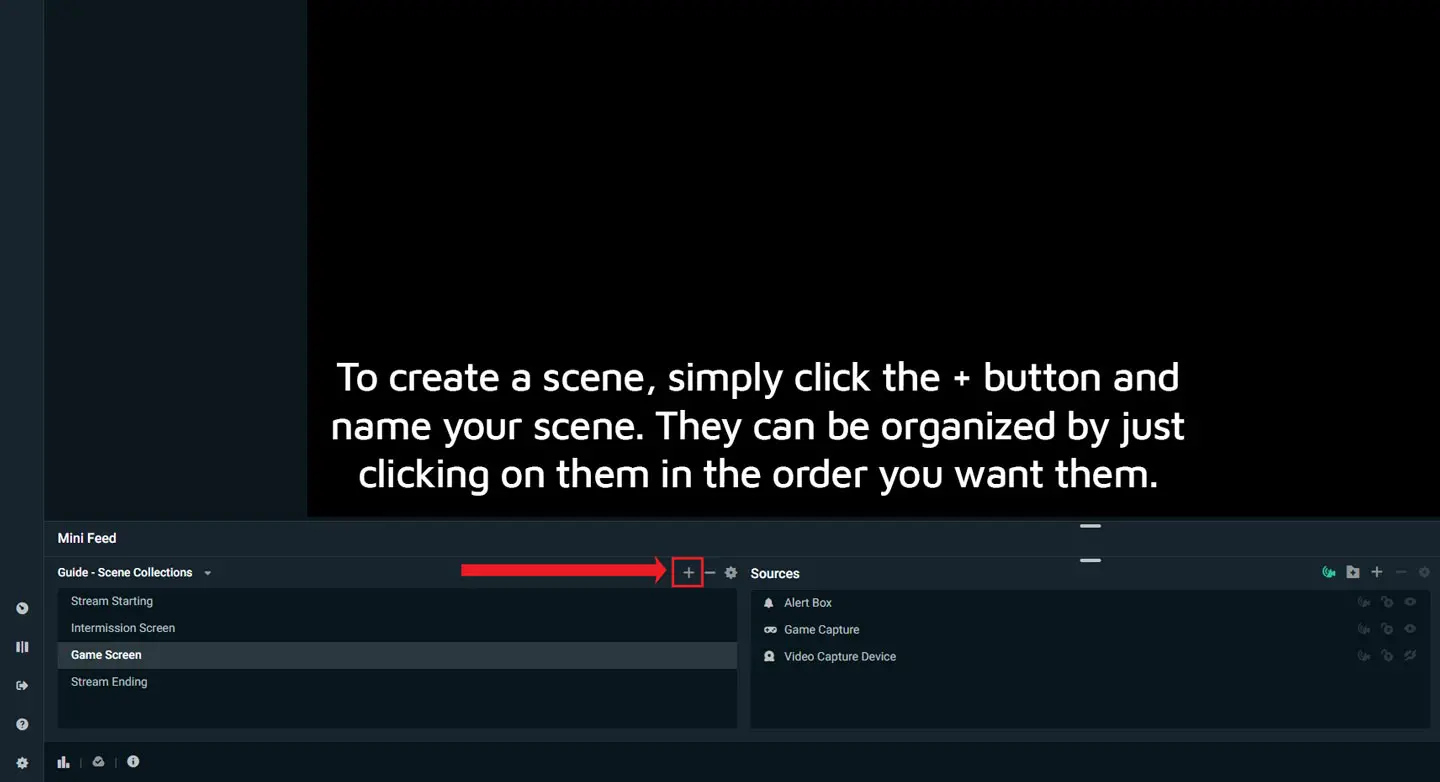
Stream Starting Scene
When you want to go live on your platform, make sure you’ve selected this scene before you start streaming. Your followers will get a notification that you have gone online and can join your channel.
Your viewers will see that your stream is starting soon, and they are more likely to wait around.
The stream starting scene will also leave a thumbnail if someone is searching for a stream to watch and will be able to tell yours has just started. Here are some example starter scenes from popular streamers on Twitch/Mixer: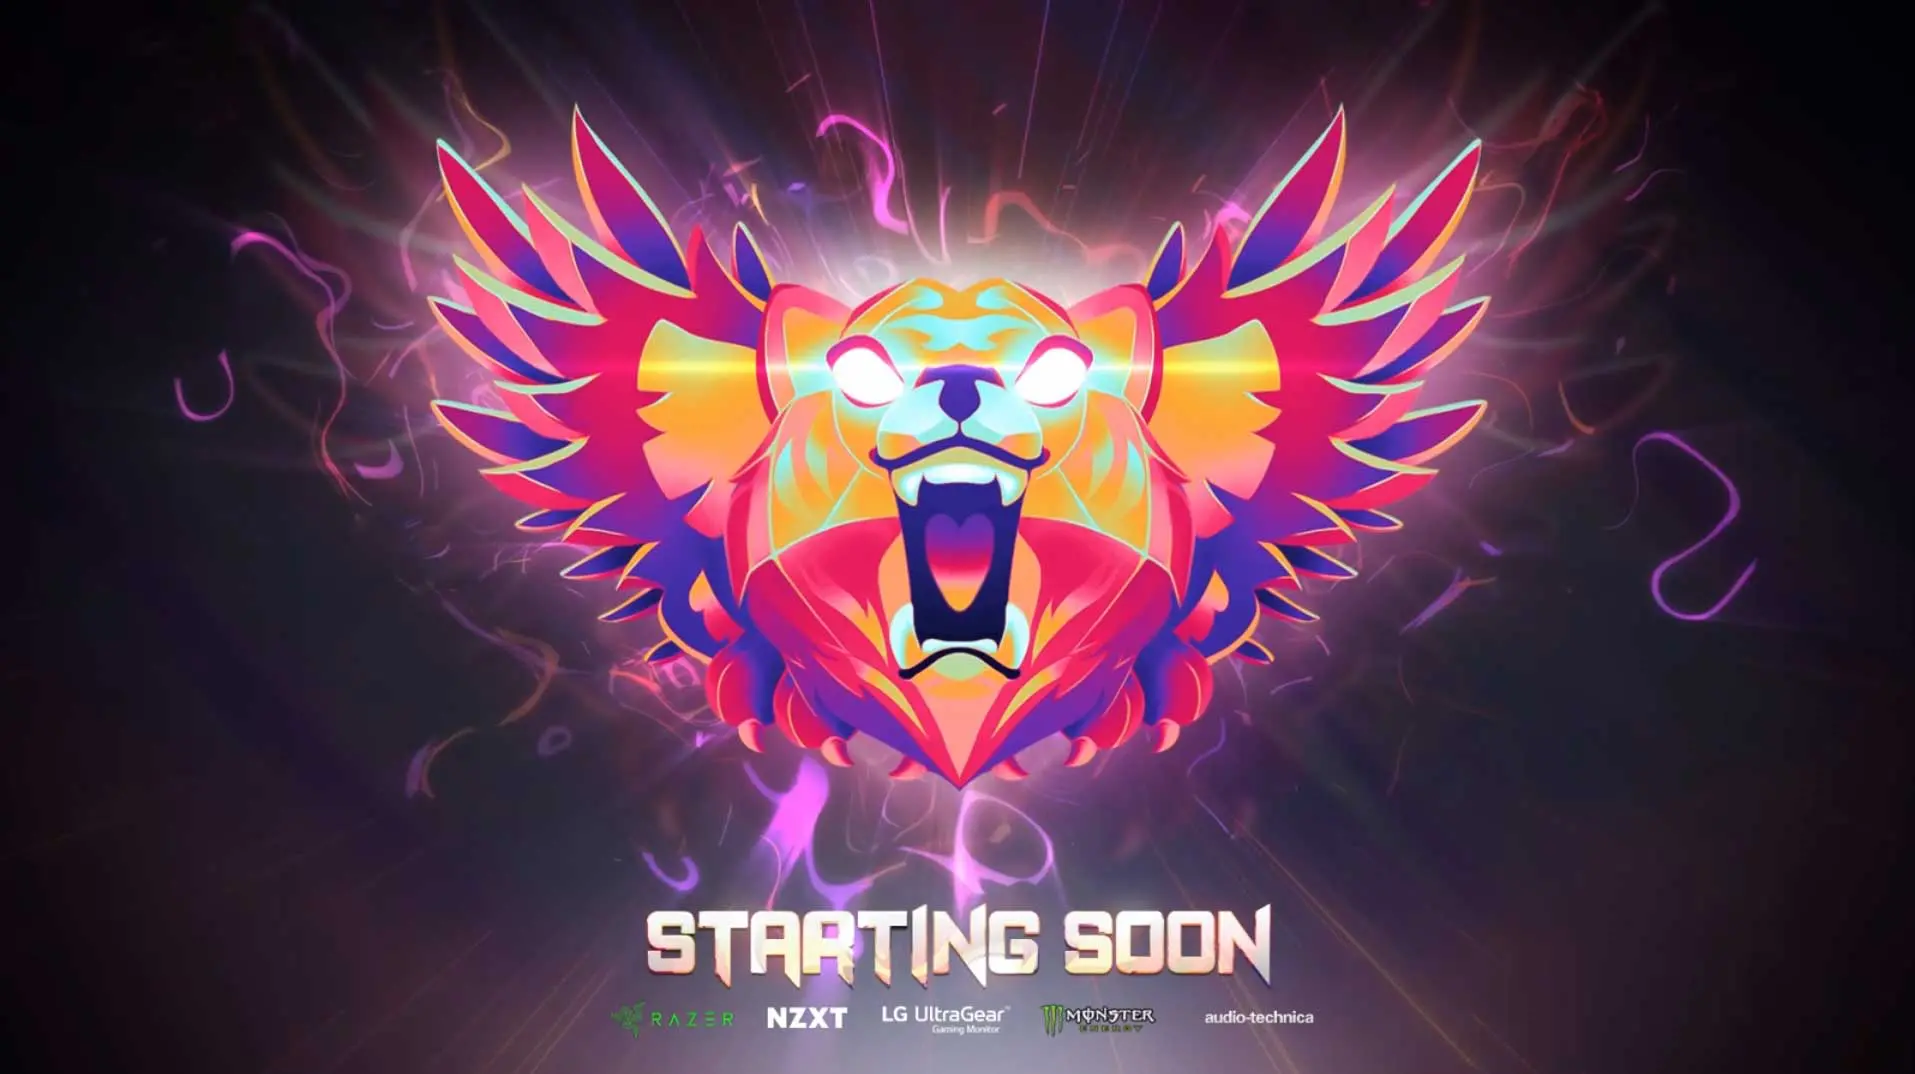 TimTheTatman
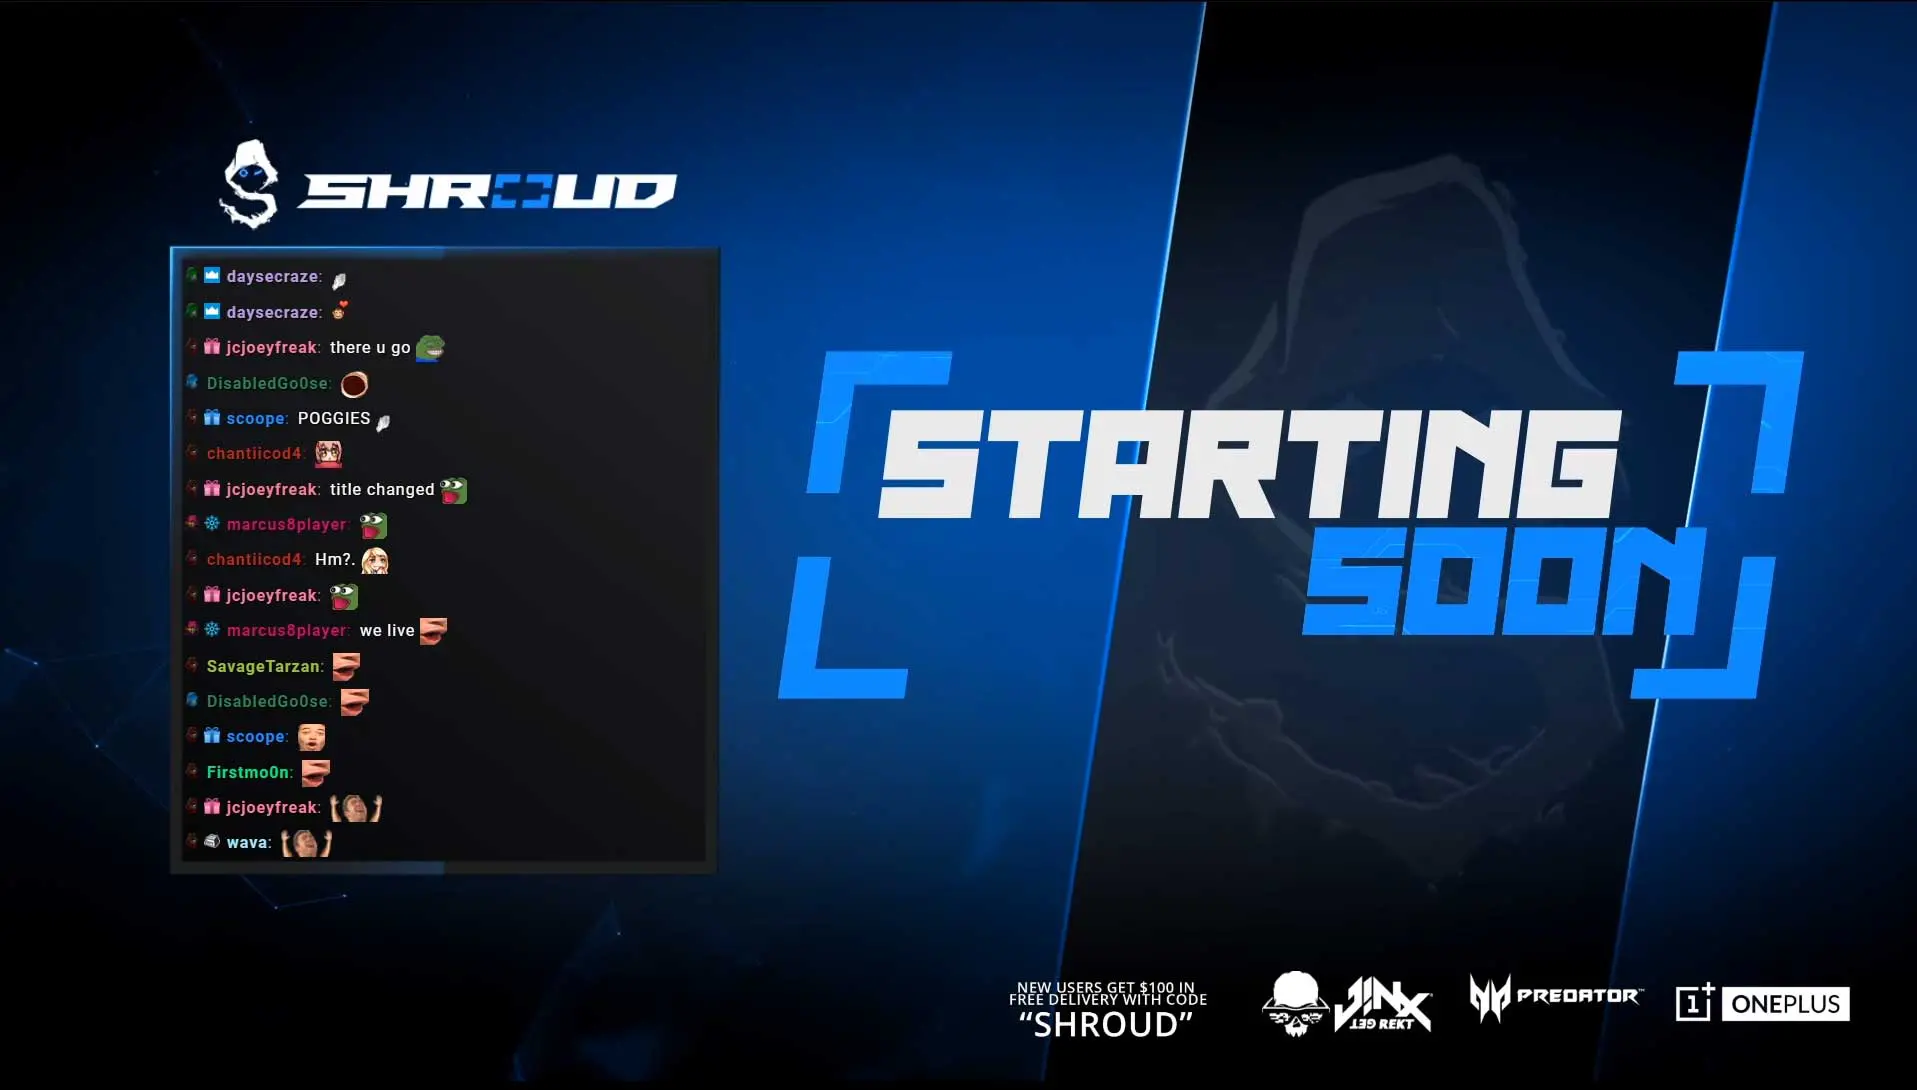 Shroud
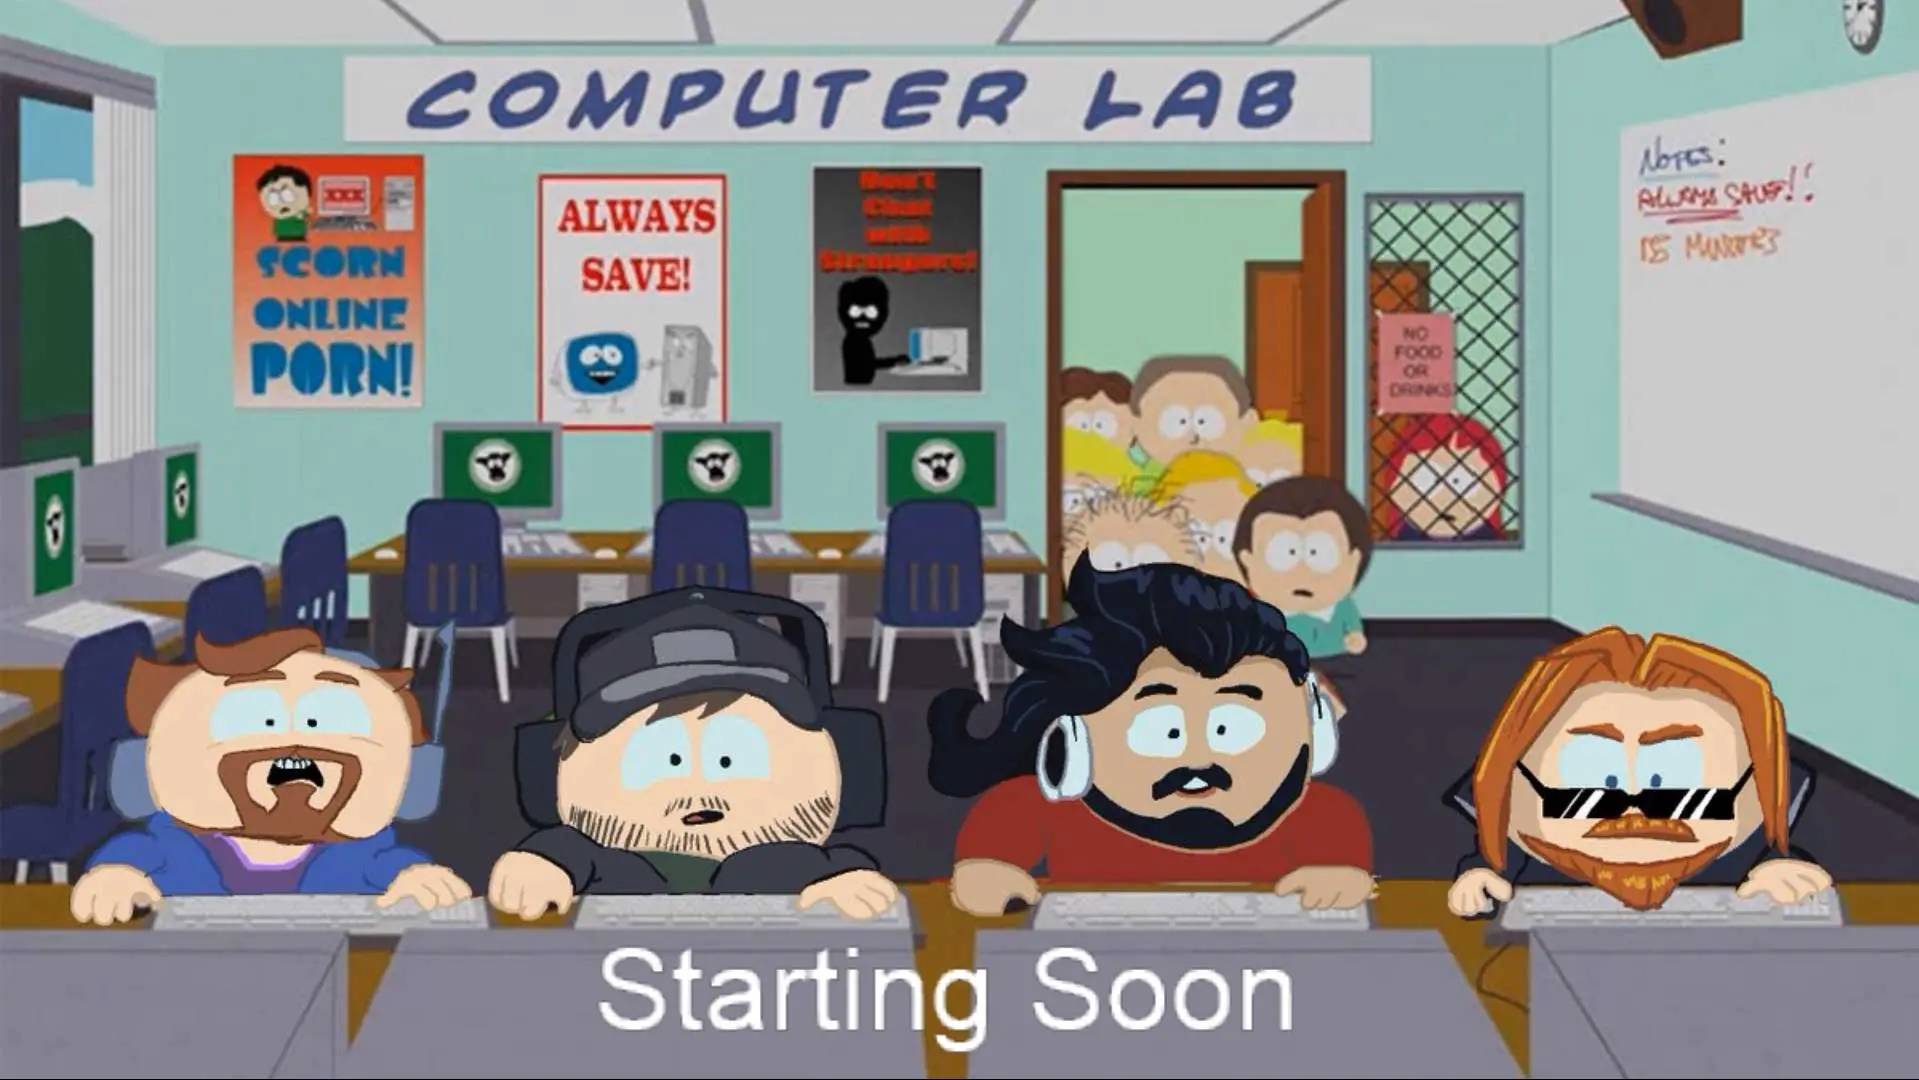 Asmongold
Intermission Scene
Streamers like to create intermission scenes, where they can switch to it on the fly while either waiting to get into a game or to chat with their viewers.
By doing this, it enables them to give their viewers something else to look at while everything else happens in the background. Most viewers appreciate this as its typically done in between games, which provides a small downtime to chat with the streamer.
The content host usually gets a little break from this, and it lets him catch up with everything. It just gets everyone involved and helps to promote a good community.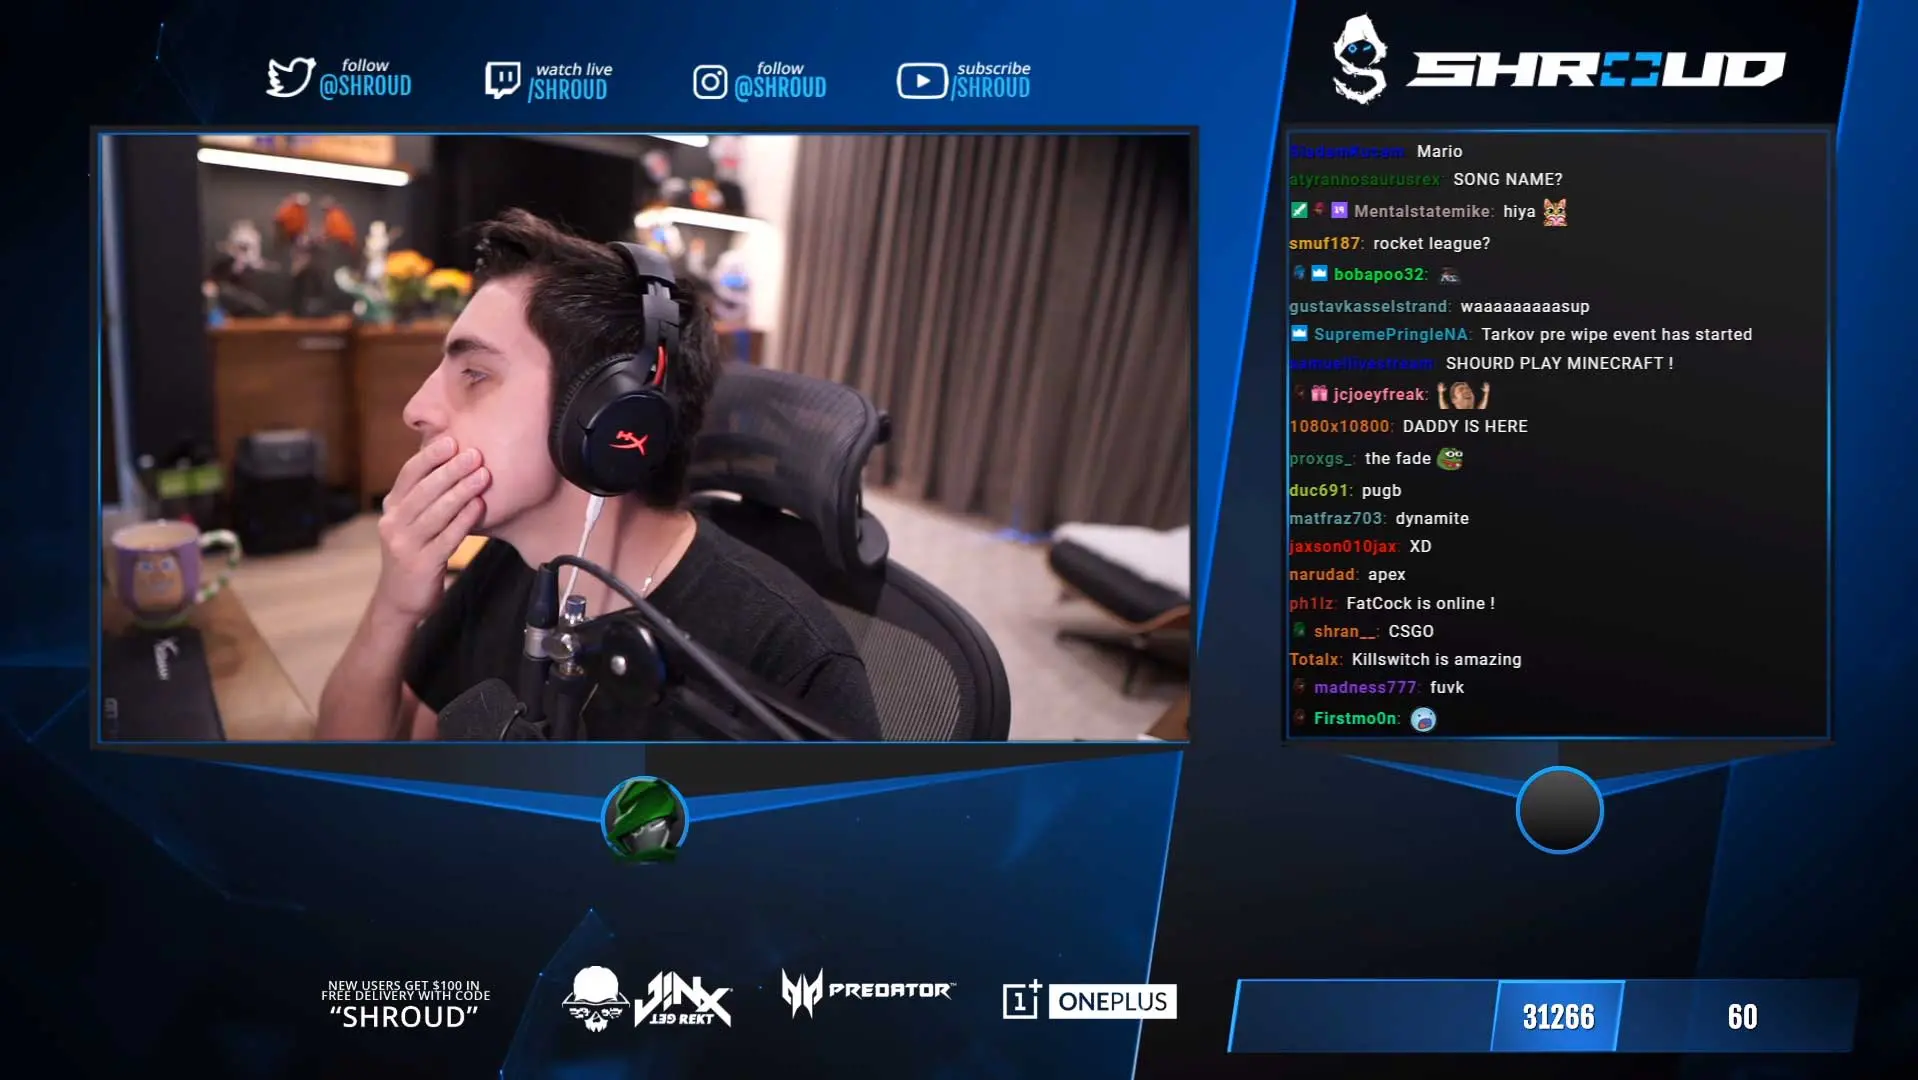 Shroud
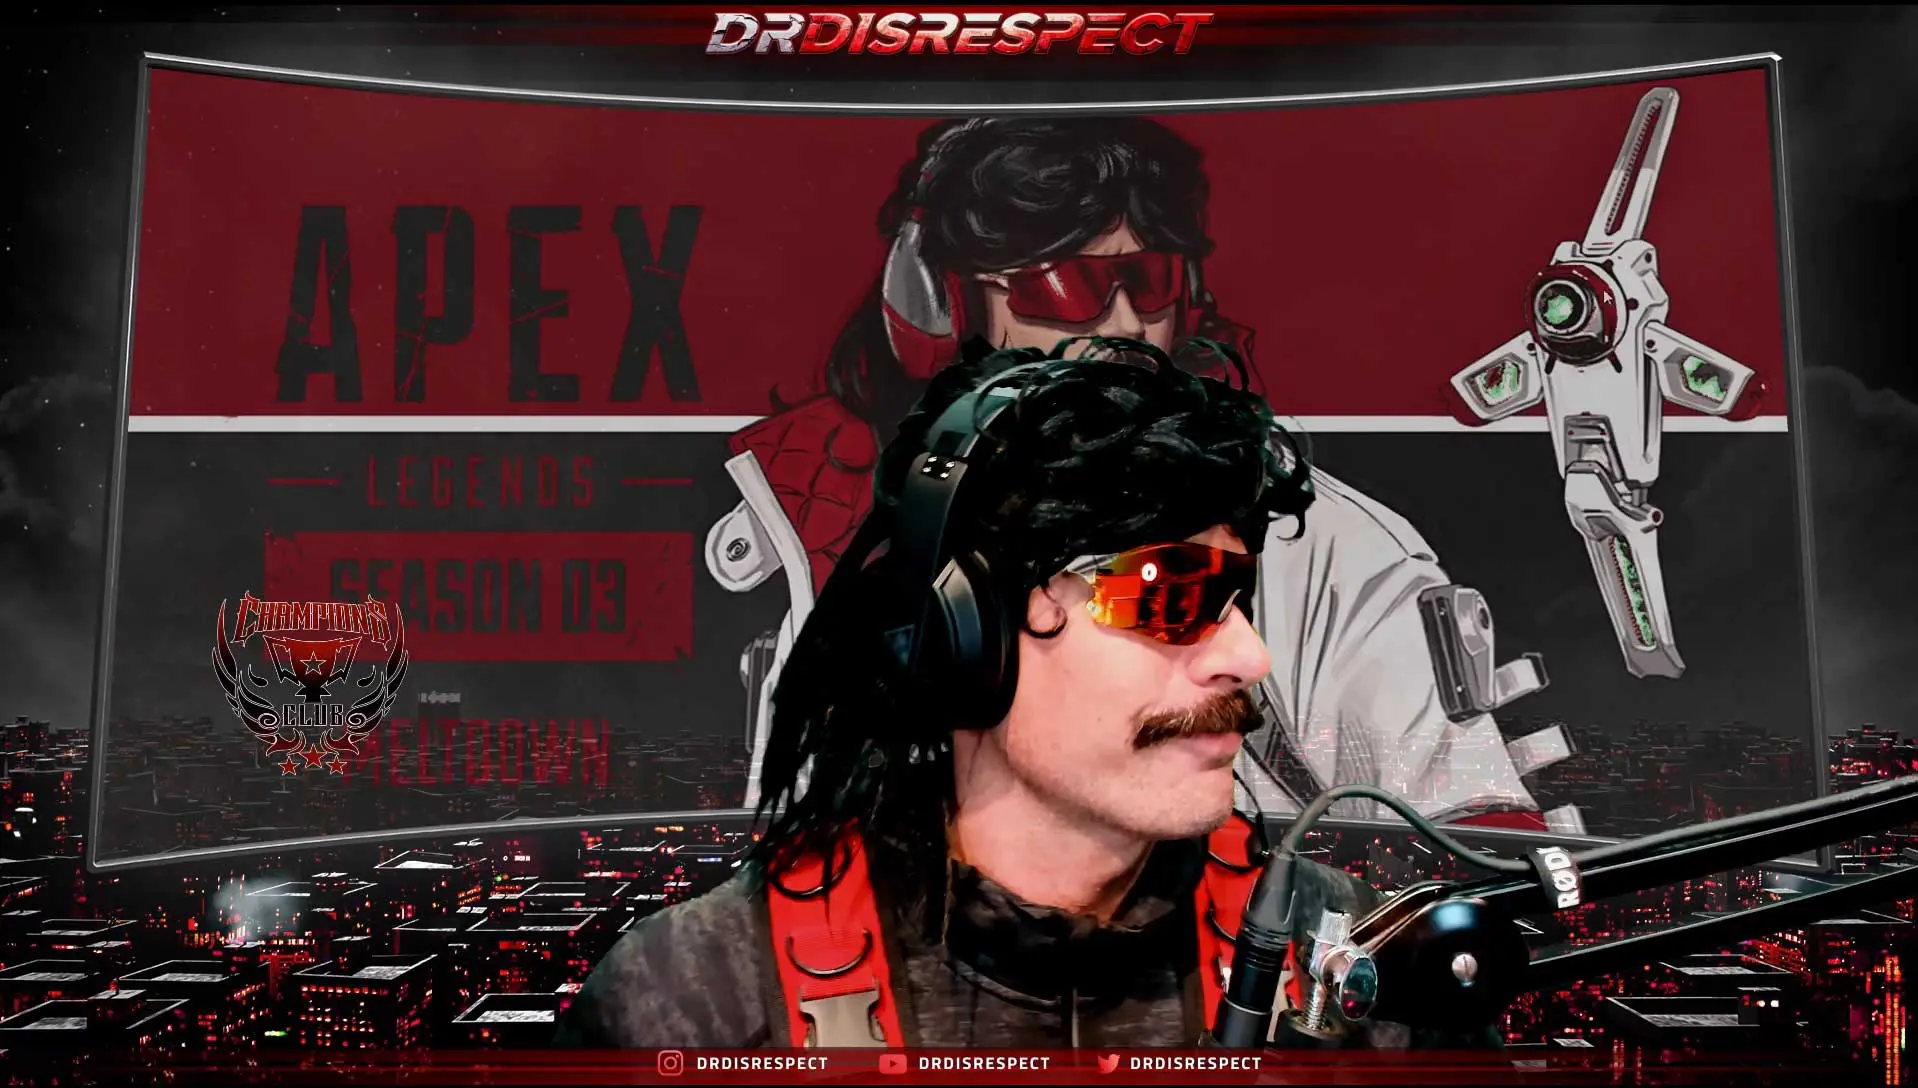 Dr Disrespect
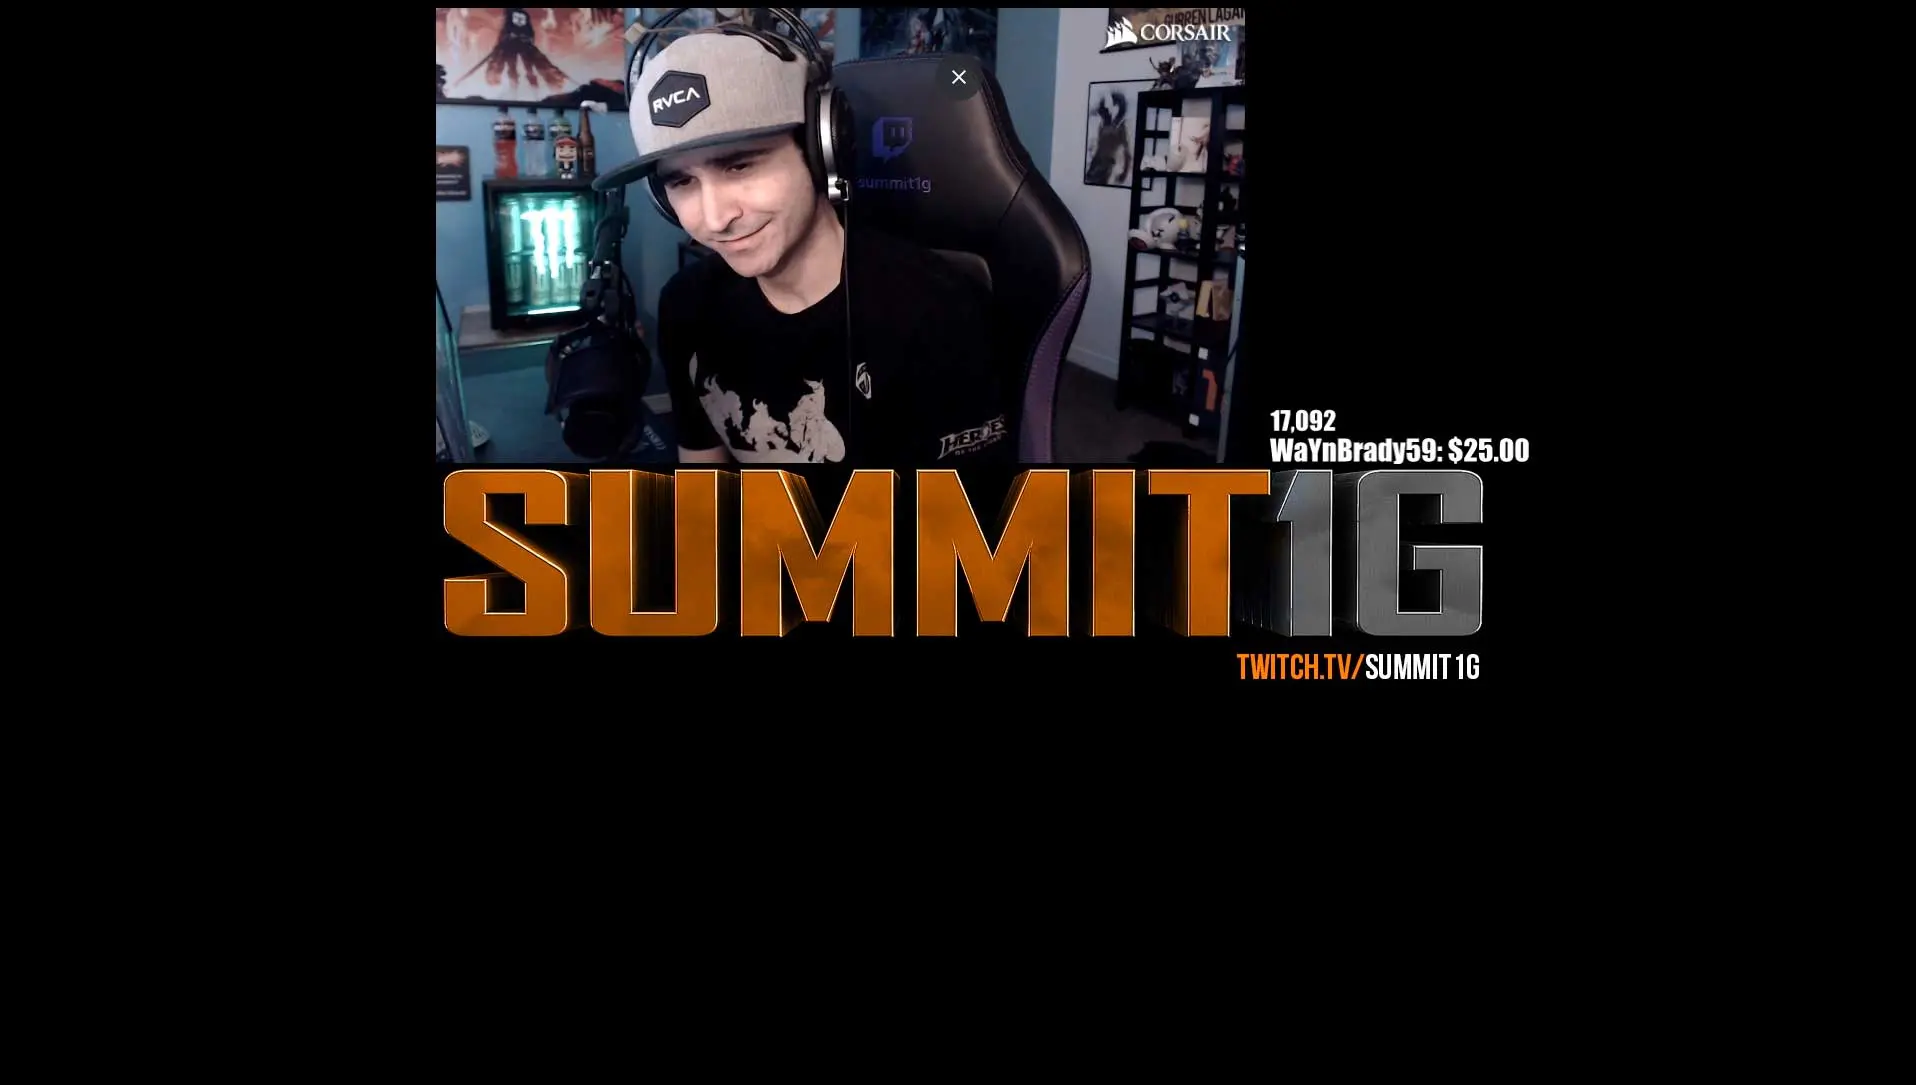 Summit1G
Game Scene
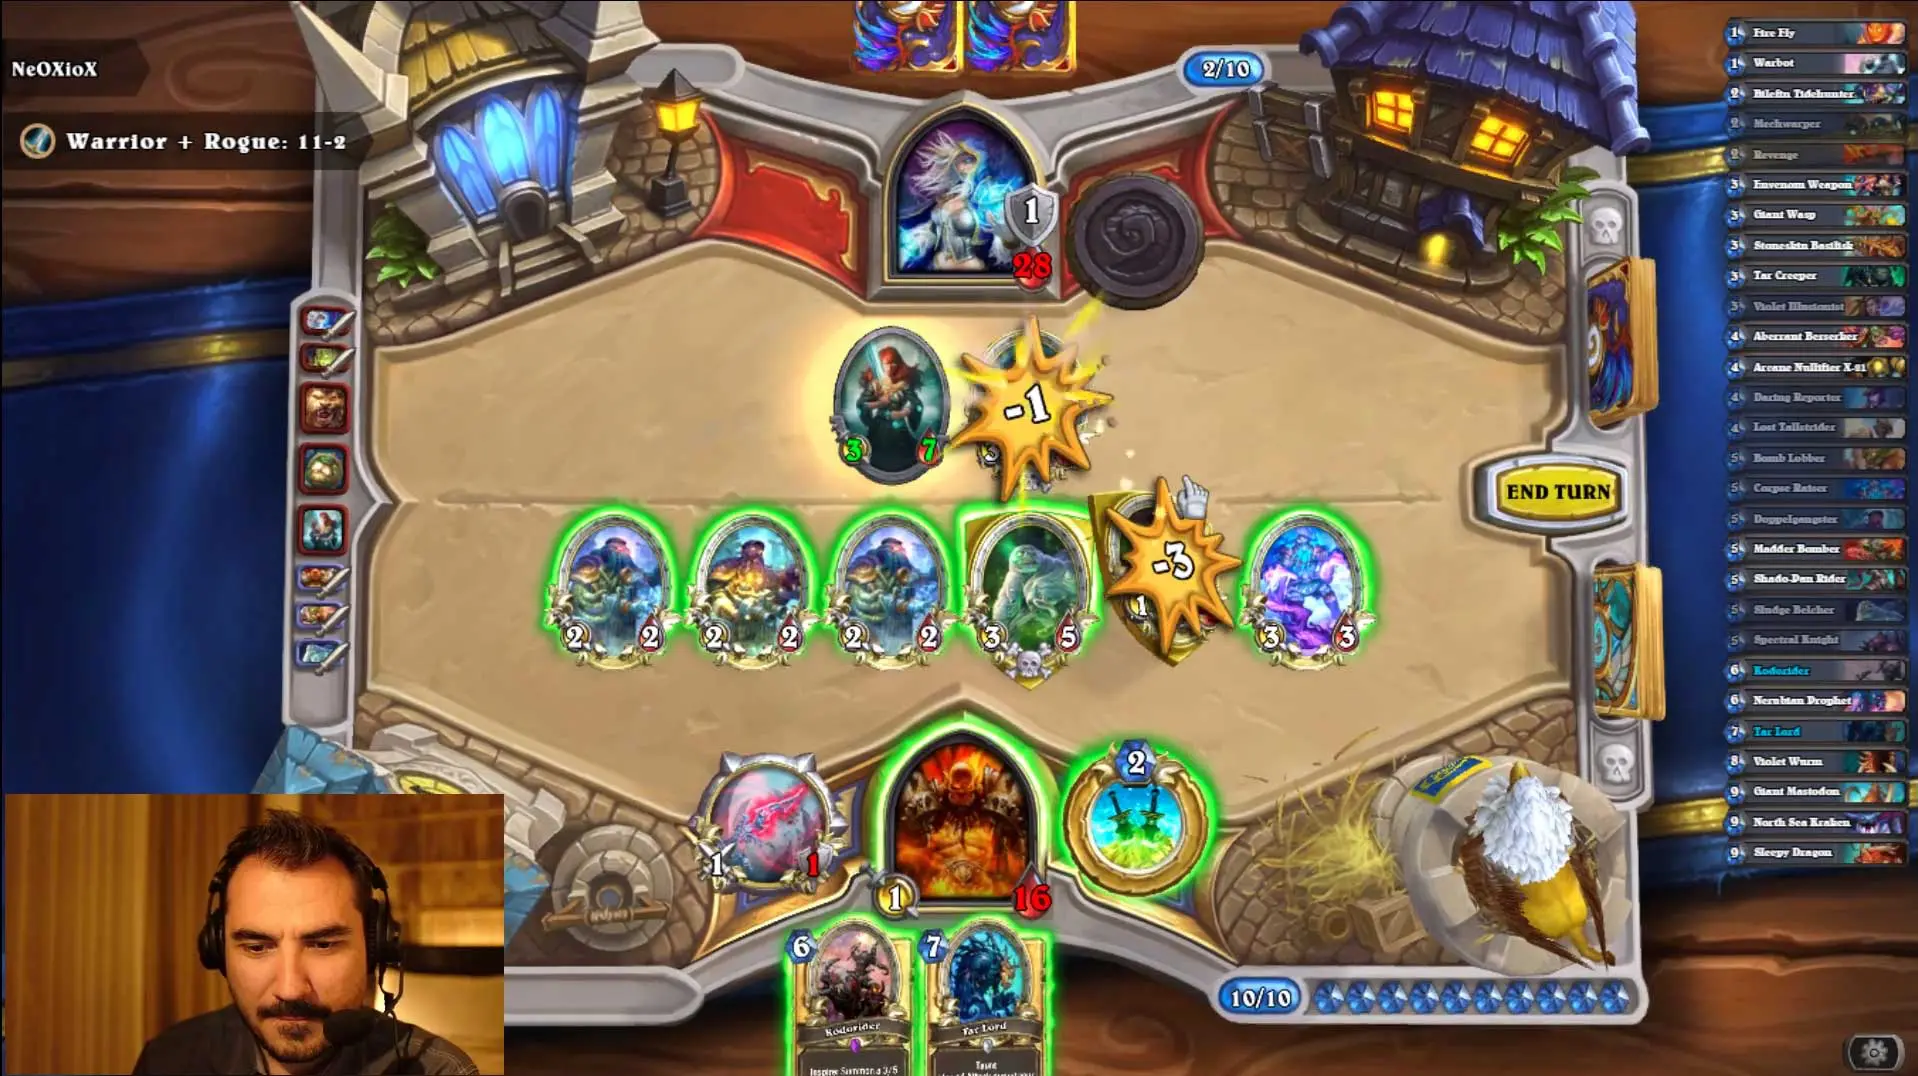
The game scene will be the main attraction as it typically includes gameplay. Couple gameplay with a webcam section and a beautiful overlay, and you have a good stream going.
Don’t add too much clutter as it tends to distract viewers from what is happening on-screen during the game. Keep it simple, and keep it clean!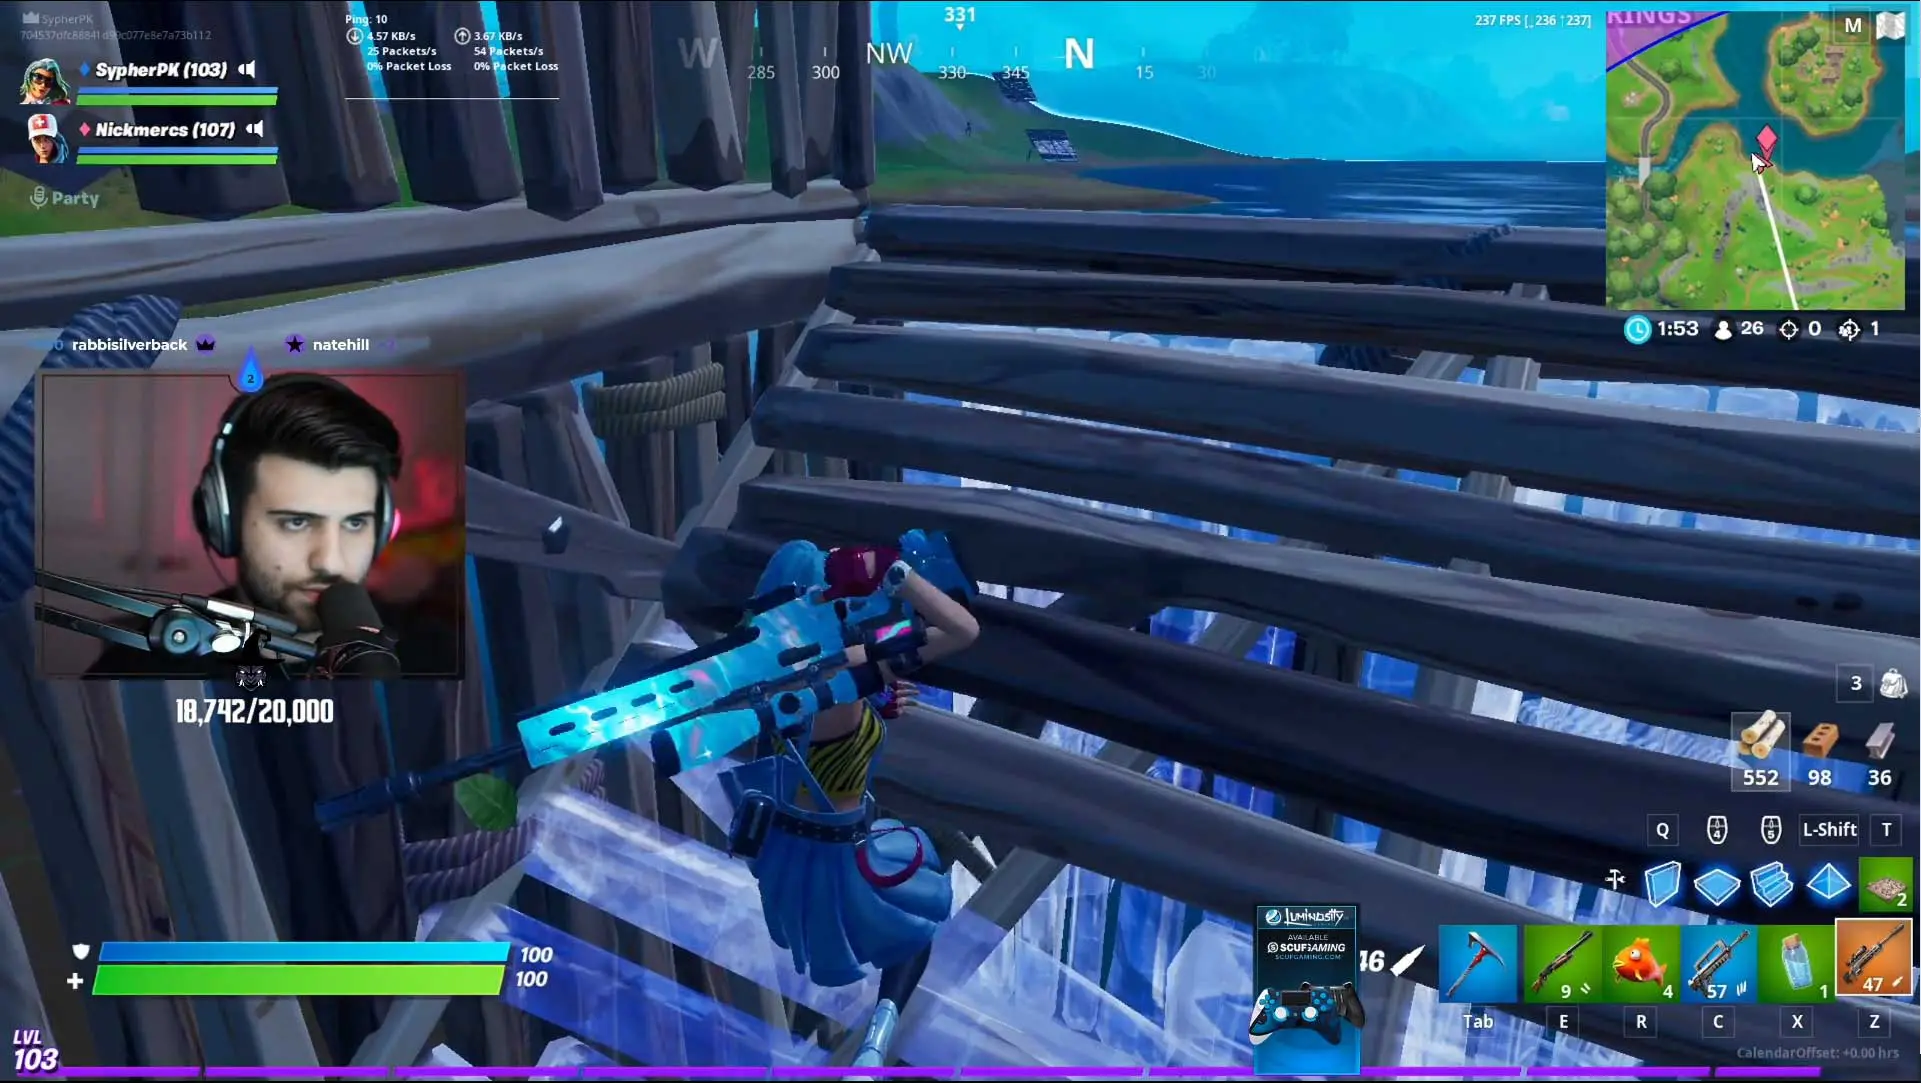 SypherPK
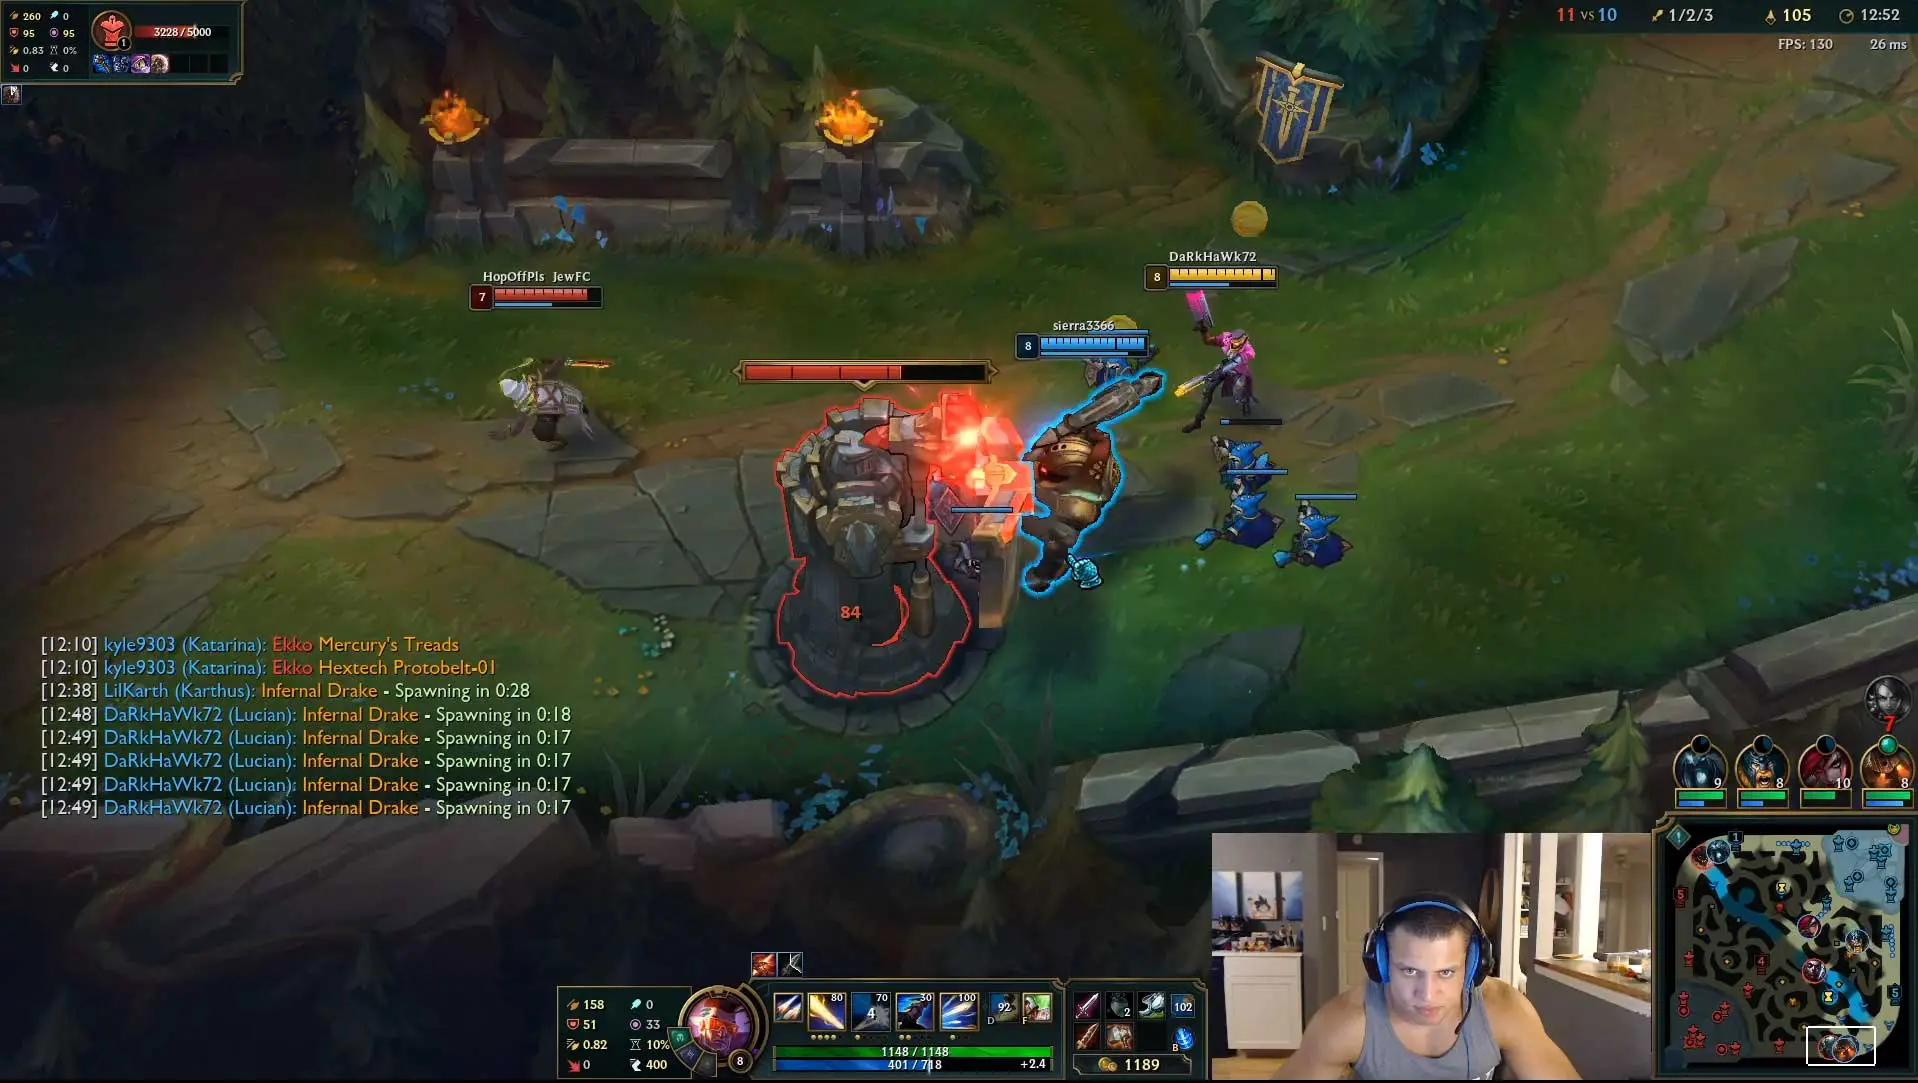 loltyler1
 nl_kripp
Stream Ending Scene
Nothing too fancy here, just a little something to let viewers know that the stream is over. Some streamers say goodbye and get off. Both are fine, honestly.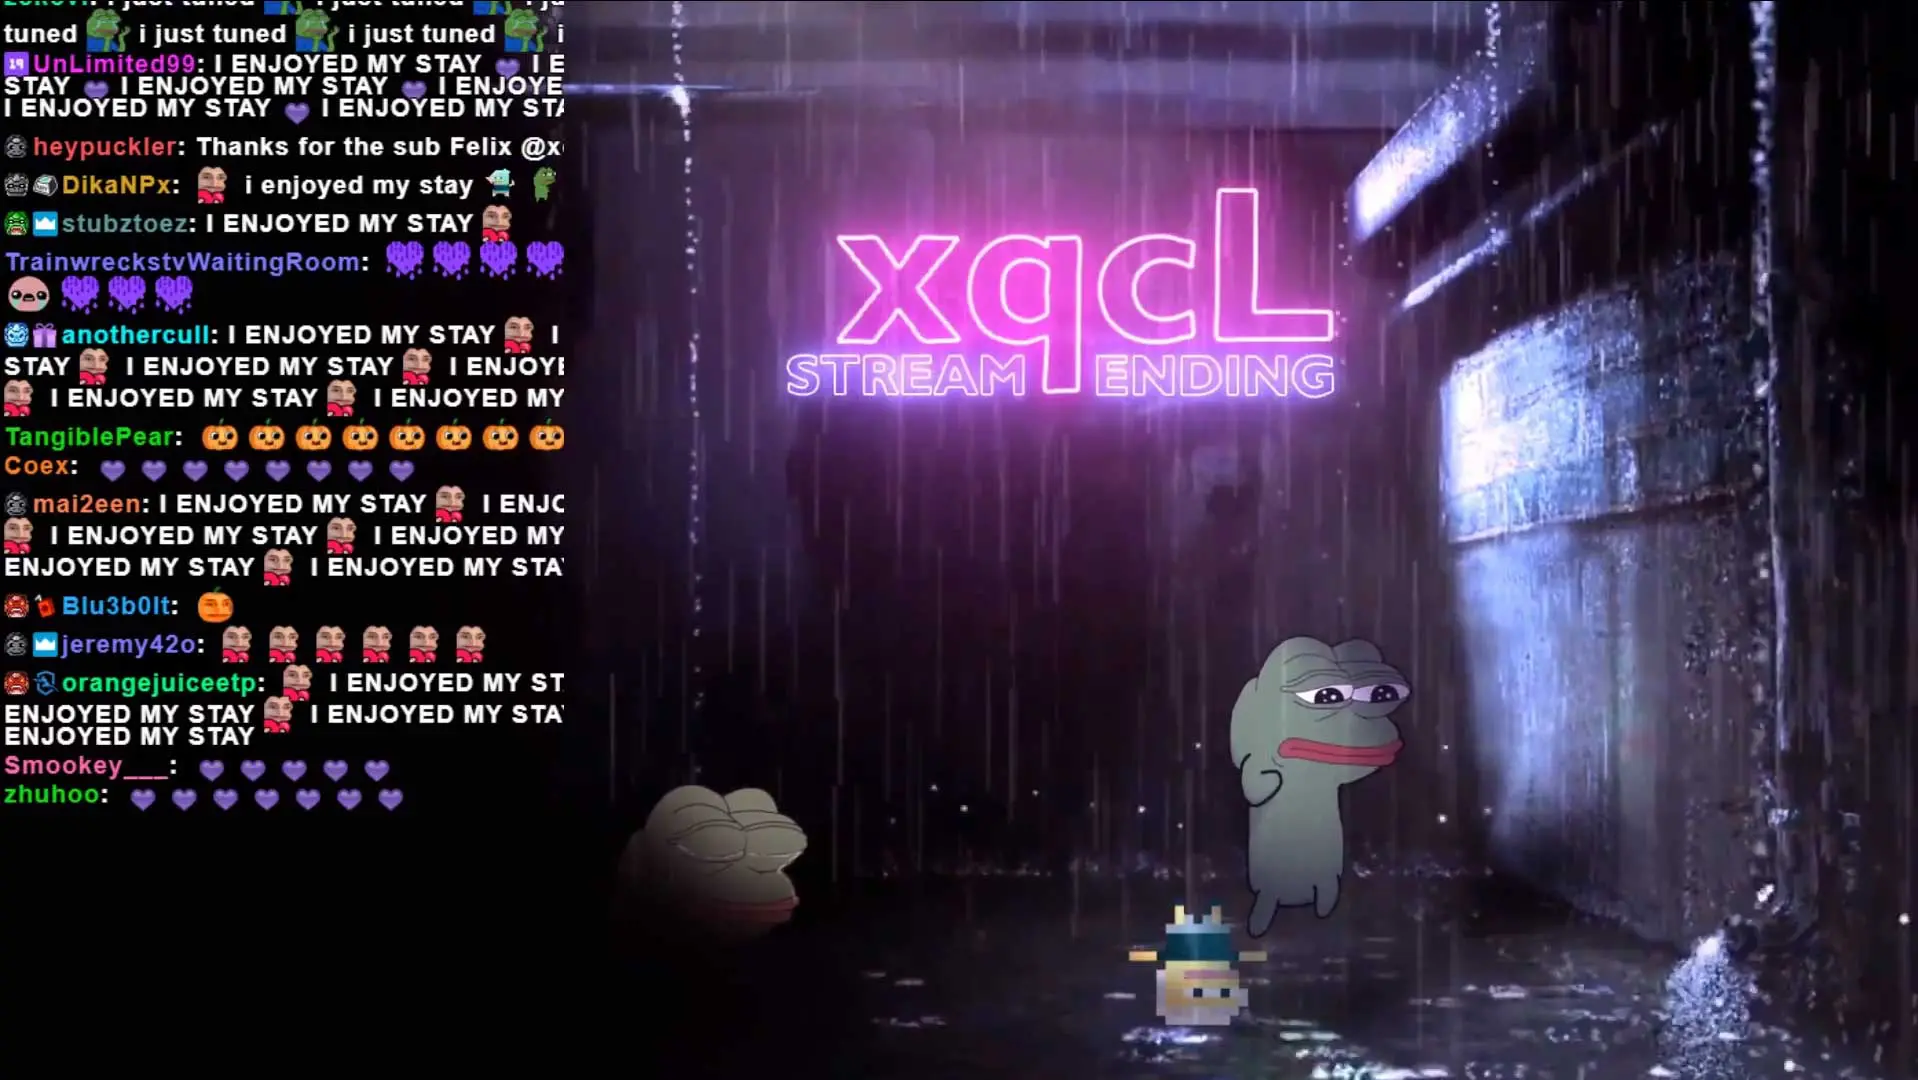 xQcOW
xQcOW AdmiralBahroo
Adding Sources to Our Scenes in Streamlabs OBS
Now that our scenes are set up, we can start adding some sources to complement the look of the stream. We will begin with our game scene. Here we’ll set up three primary sources that every streamer should have:
1. Game Source
2. Webcam Source
3. Overlay/Image Source
4. Alertbox Source
To begin, make sure your game scene is selected in the Scenes section and click on the little “+” icon in the Sources section to bring up the list of sources that you can add.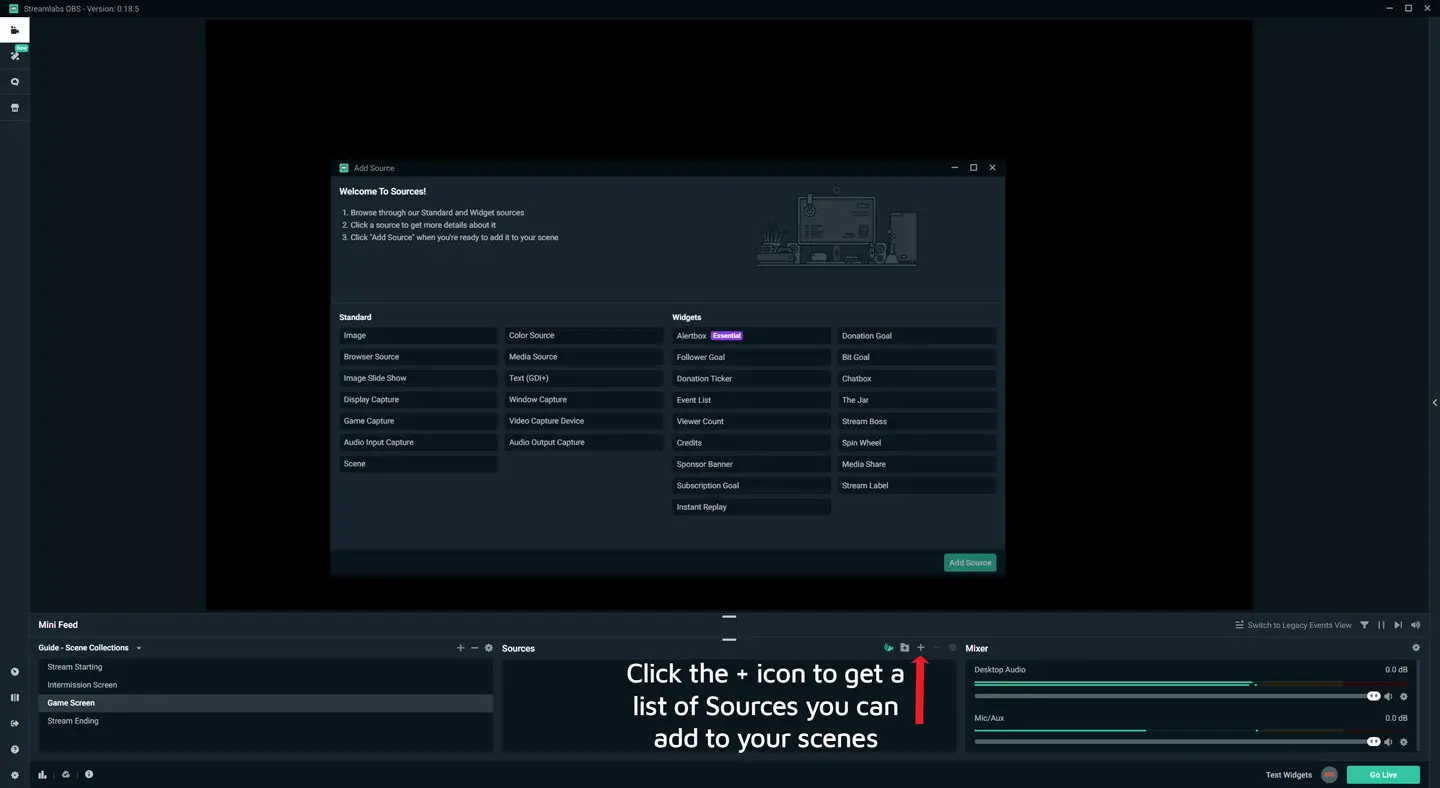
Adding a Gameplay Source in Streamlabs Obs
For your game to be able to get picked up by Streamlabs OBS, you will need it running in the background as you set this up. Otherwise, Streamlabs OBS won’t see the process running and won’t be able to select it.
You might need to restart your Streamlabs OBS software if it does not pick up the game. Leave the game running in the background and it should get picked up. Ultimately, you can just leave it so that it picks up any fullscreen application instead.
There are currently three methods of capturing your game. The most preferred way to do it is using the Game Capture source as it directly captures the game application (DirectX/OpenGL).
Not all games will need the Game Capture source, as many of them work fine on borderless window mode. In which case, the preferred capture method would be the Window Capture source. The frames are limited to 60 fps in window applications such as fullscreen window/borderless window, and Window Capture works well with this.
Last but not least is the Display Capture source, which is one of the worst-performing sources for capturing games out of the three. It is recommended trying to use either Game Capture or Window Capture before trying Display Capture.
In terms of performance, this is the consensus in ranking for them:
1. Game Capture (always use this unless it won’t work)
2. Window Capture (Borderless window is fantastic with this and super stable)
3. Display Capture (least performing one of all, and your monitor/desktop is shown to everyone when you exit games)
Configuring a Game Capture Source in Streamlabs Obs
Once you add your Game Capture source, you will need to configure it, so select it in the Sources section and click on the little gear icon. Once the properties window opens, you will be able to choose the following Modes:
1. Capture any fullscreen application
2. Capture specific window
3. Capture foreground window with hotkey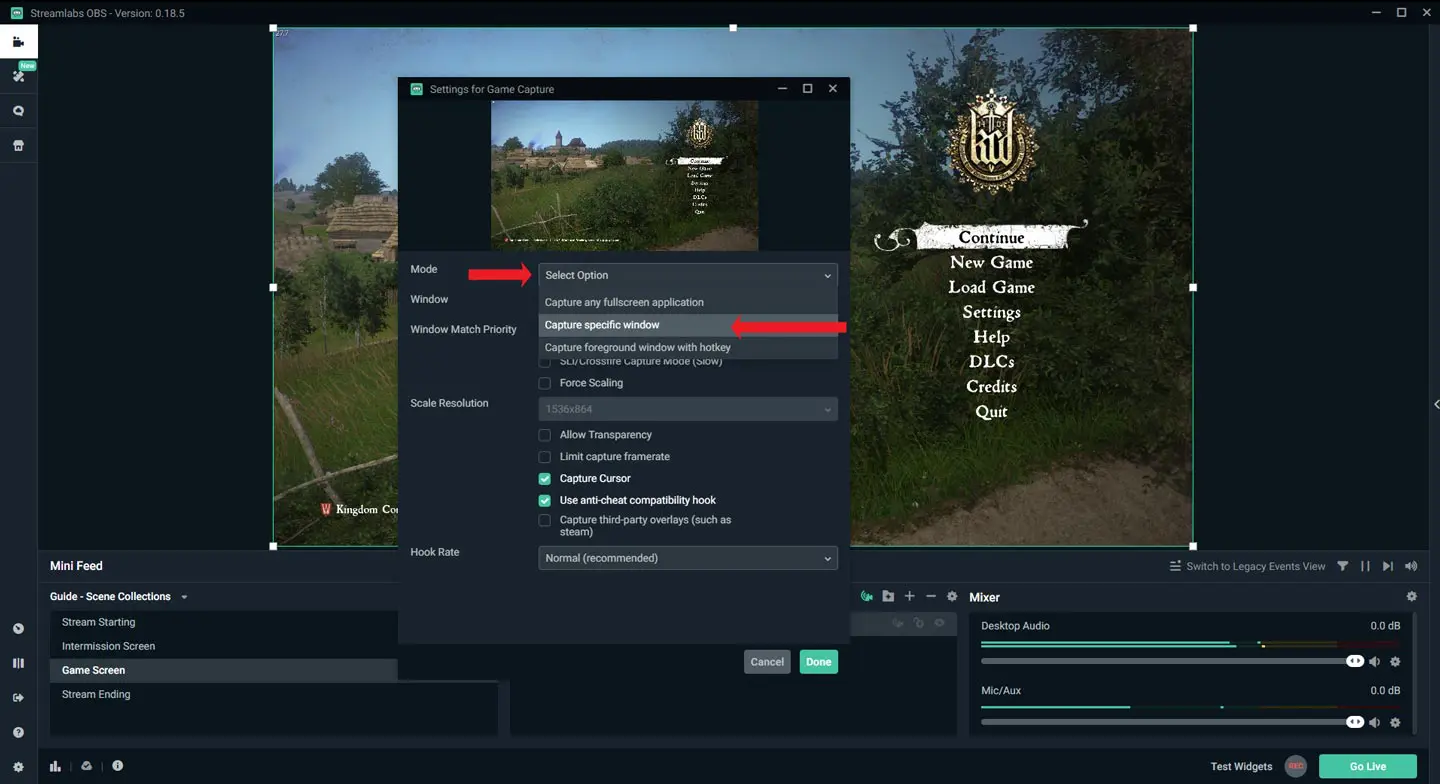 My recommendation for which mode to use is: Capture specific window.
It gives you the freedom to show what you want to your viewers, and it allows you to select the exact application you want. You can choose the program you wish to display under the Window drop-down list.
You can also change your Scale Resolution to 720p. With that completed, all that’s left is to click OK.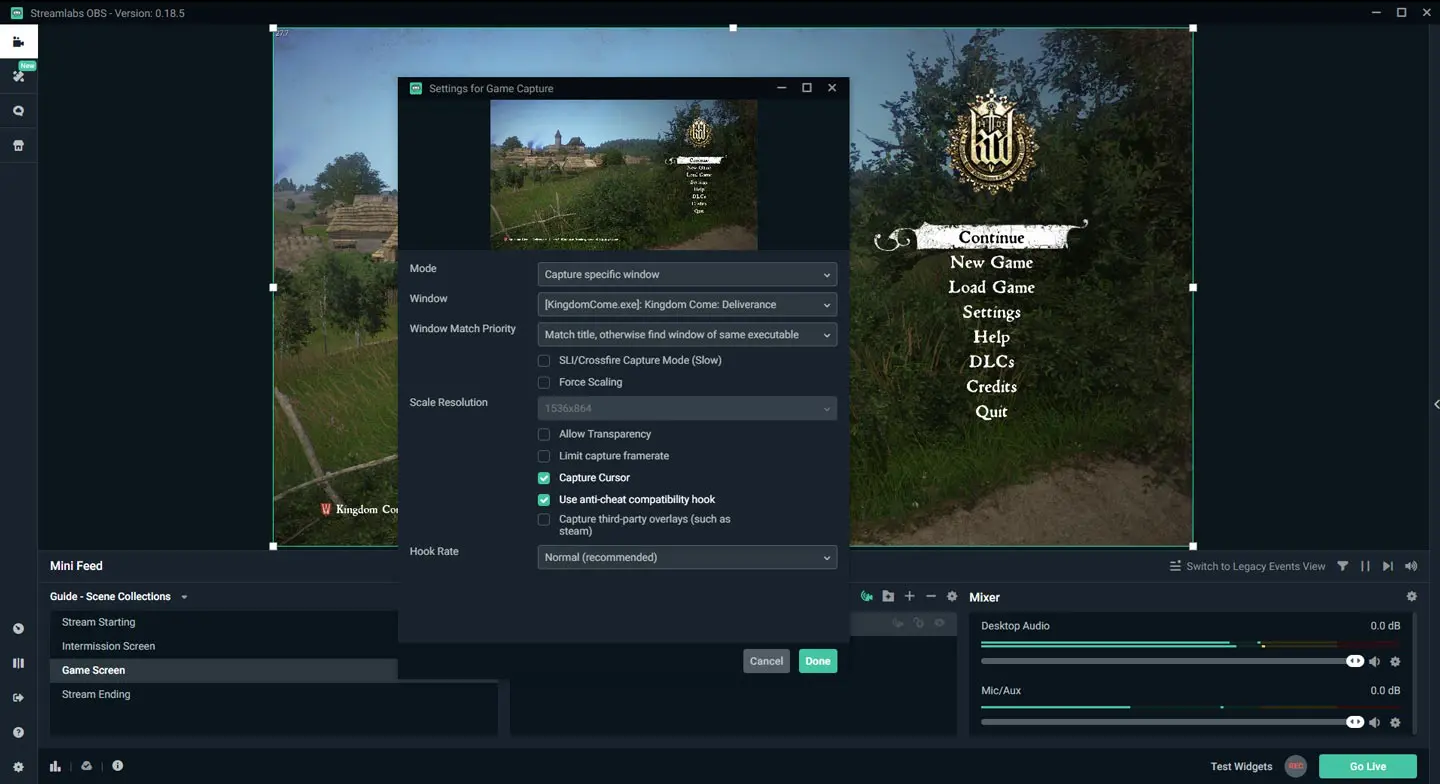 Now that you have added your Game Capture source, you are ready to move on to the next step.
If you have issues with the capture being too big or too small for your preview, right-click on your Preview section, hover over Transform and select Fit to screen.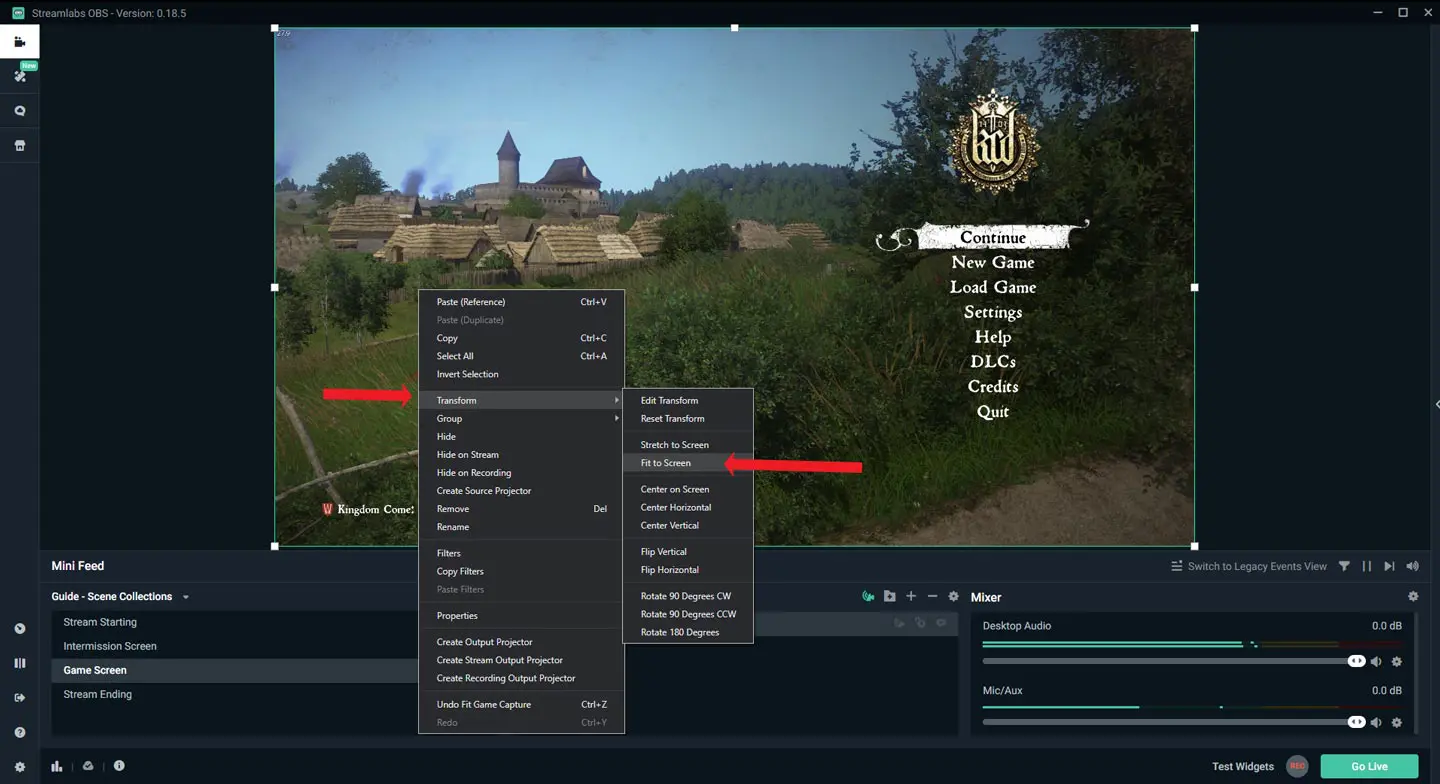
Configuring a Game Capture Source in Streamlabs Obs
Now that our Game Source is set up, we will look into getting our video capture source (webcam) configured. Make sure the Game source is under the Webcam/Video Capture source. If you don’t do this, your webcam won’t show. You should layer your sources in this order to avoid conflicting issues:
1. Overlays/graphics
2. Everything else
3. Webcam Source
4. Game Source
You can change the order of your sources by clicking and dragging them higher/lower.
Similar to adding a Game source, you add a Video Capture source the same way. Click the “+” icon and select the Video Capture Device option. Give it a name, and then hit OK.
The properties window for your webcam or camera should now be open. You can select the device you want to use in case you have multiple cameras. If you are starting out and only have one webcam, it will be already auto-selected.
For starters, unless you are going for a studio-quality production or are doing a big webcam scene for your intermission screen layout, I’d recommend setting a custom resolution of 720p (1280×720). If you are new to streaming, 720p is more than enough, and your CPU will thank you. All that’s left is to resize your webcam source in the preview section.
Pro Tip:When resizing your webcam, if you hold Left-Shift while resizing, it will break your aspect ratio and allow you to resize it anyway you want. Make sure to keep your Webcam source over your Game Capture source.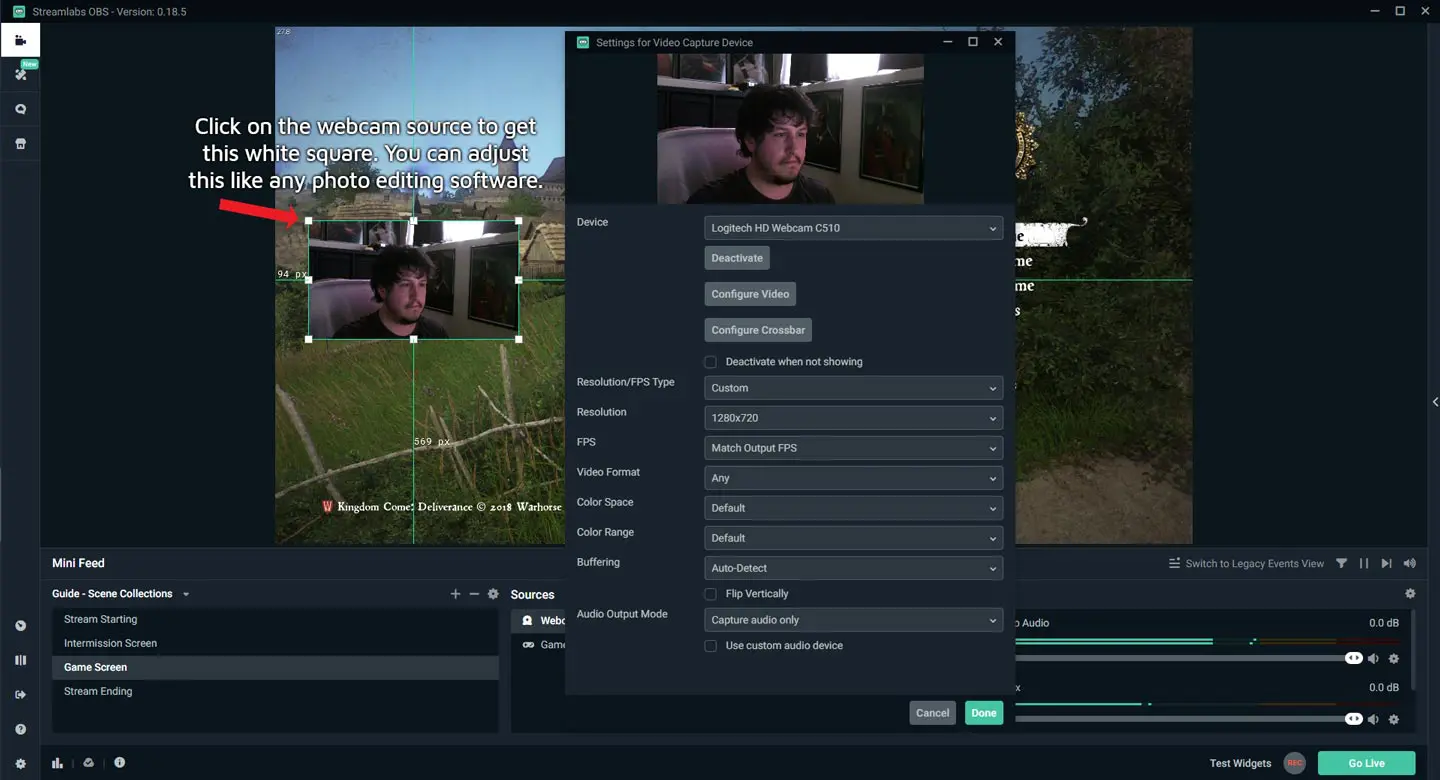
How to Add an Overlay in Streamlabs OBS
Now that we have added a Game Capture source and a Video Capture source, your stream should be looking good. To get your stream to pop off, you will need to add in some images/graphics and overlays. A very simple graphic or overlay to add is a webcam border. There are plenty of these that you can find for free.
The benefit of getting an overlay over some smaller graphics pack is that it includes everything (most of them).
Overlays come with a stream starting scene with a beautiful background (some even animated), an Intermission scene, and a stream ending scene. Furthermore, it comes with every icon/graphic/sounds/alerts you need. Lastly, some overlays include panels that you can add to your streaming channel itself.
Not everyone is an artistic type. Don’t worry! You can get some free overlays, widgets, icon packs, transitions, and much more from Nerd or Die. They have a Name Your Price section, which allows you to put any price you want for a kit.
You can put 0.00$ if you wish and get it for free (but it’s always nice to give a little something for their hard work). If you are going to take streaming seriously, spending 10-30$ to have a complete package that comes with everything is very worth it and recommended.
Check out the following overlay reviews we have done: Retrowave
Nonetheless, once you’ve downloaded an overlay pack (I got the Clearview pack), all you need to do is unzip it to a location on your hard drive. With the files extracted, you can start adding some of your overlays.
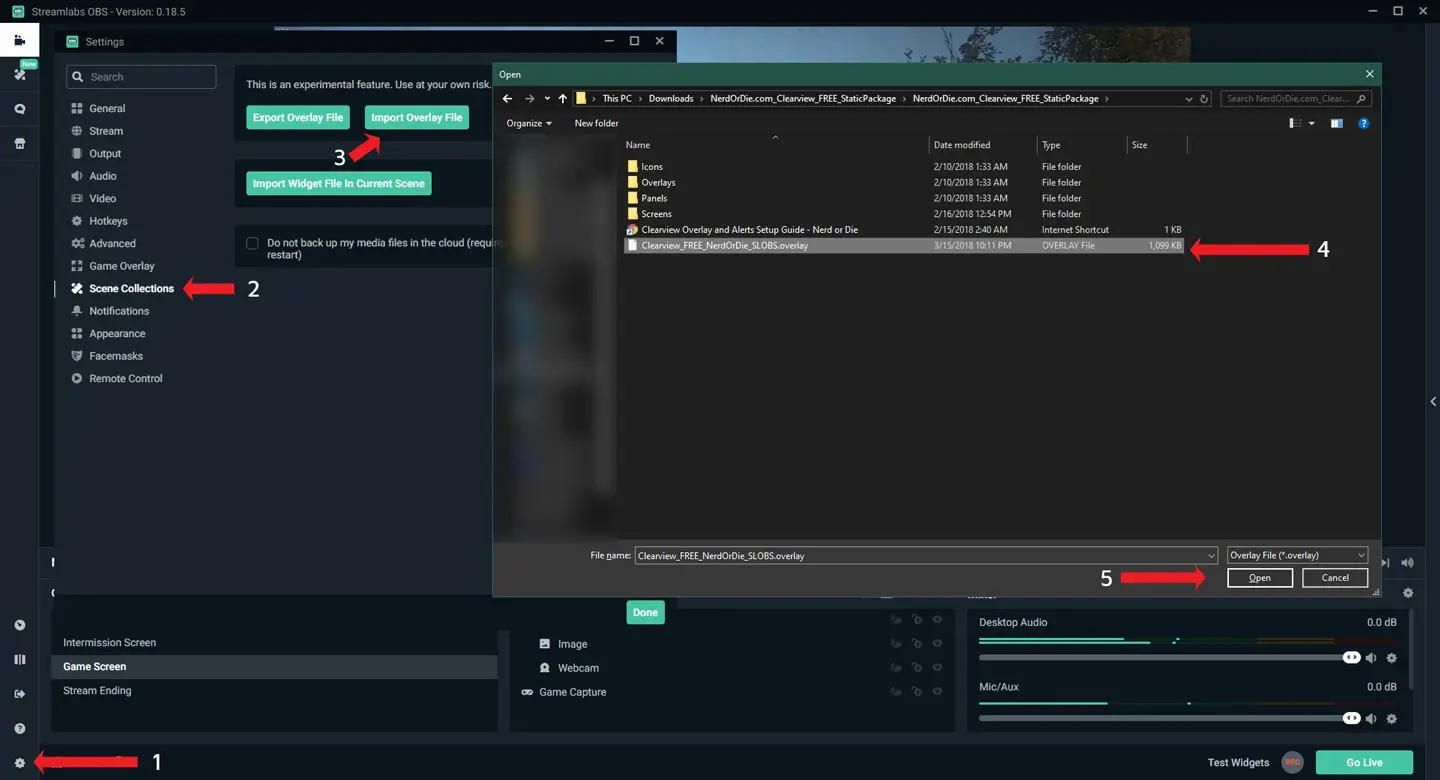
With Streamlabs OBS, they have an import overlay function, which allows you to load your .overlay file directly into SLOBS.
The import function is found under Settings -> Scene Collections -> Import Overlay File. Select your .overlay file in the folder you extracted and click on Open. Streamlabs OBS will handle the rest and load everything up in your scenes at the bottom left. It will have loaded its own managed scene selector (similar to a profile for scenes)
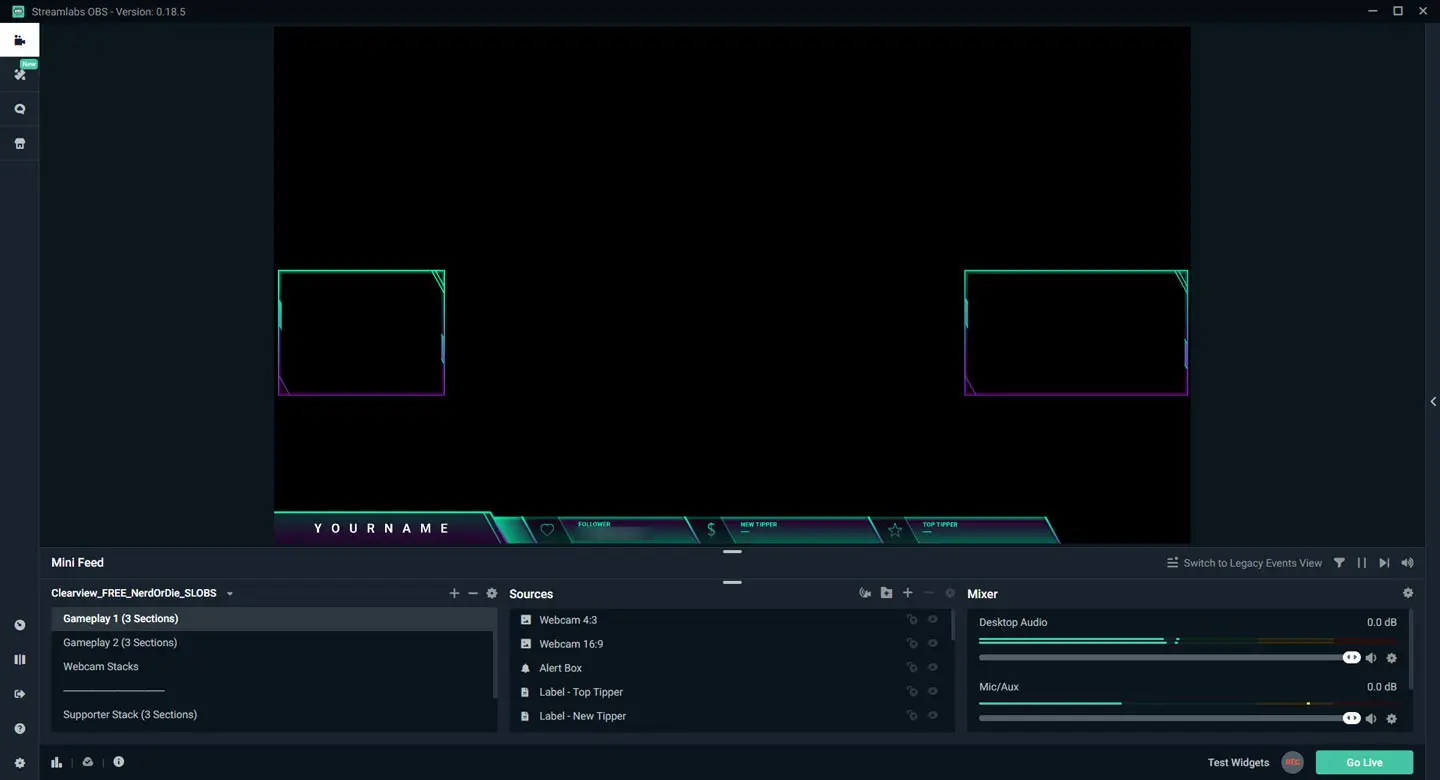
If you enjoy doing things manually or made your overlay images, follow further below as I will be showing you how to add a webcam overlay.
Adding a Webcam Overlay in Streamlabs Obs
In Streamlabs OBS, select the scene that you want to add your overlay to and add one of the following sources:
1. For a regular image/graphic, make sure you choose Image
2. For an animated image/video loop, make sure you select Media Source
Give it an identifiable name. After, it will prompt you to locate the file you want to use. Make sure you use the correct size (16:9 or 4:3) of overlay for your webcam size. If you are using 720p as a resolution, the 16:9 overlay will be what you want to use.
Head over to the extracted pack you downloaded earlier and select the appropriate image. It will show up in your Preview section. When you are satisfied with your overlay, click Done.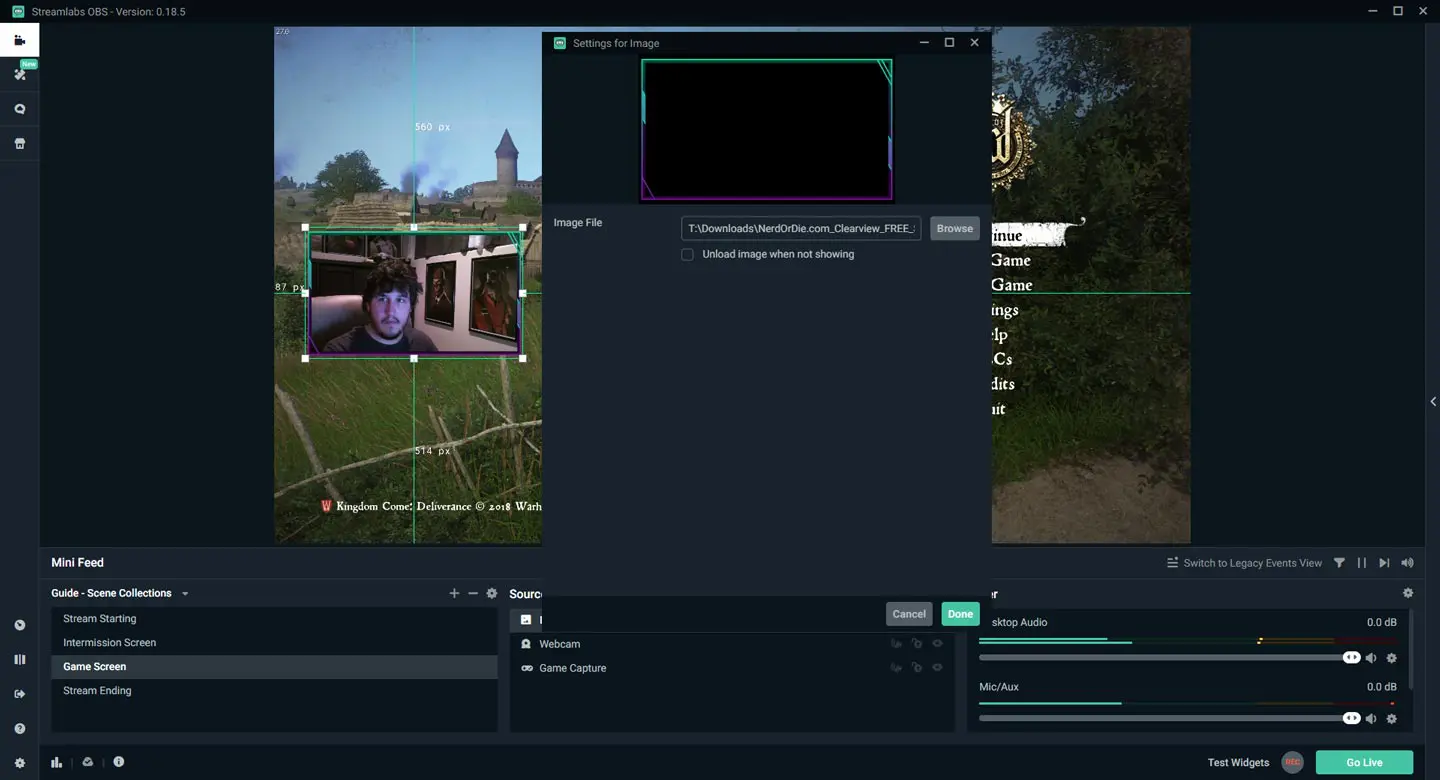 With your overlay in the Preview section, you can resize it with your webcam source so that it fits appropriately together.
When resizing images/media files, holding Left-Shift will let you break that aspect ratio and allow you to manipulate the overlay to fit correctly.
Once completed, your Preview section should look close to mine.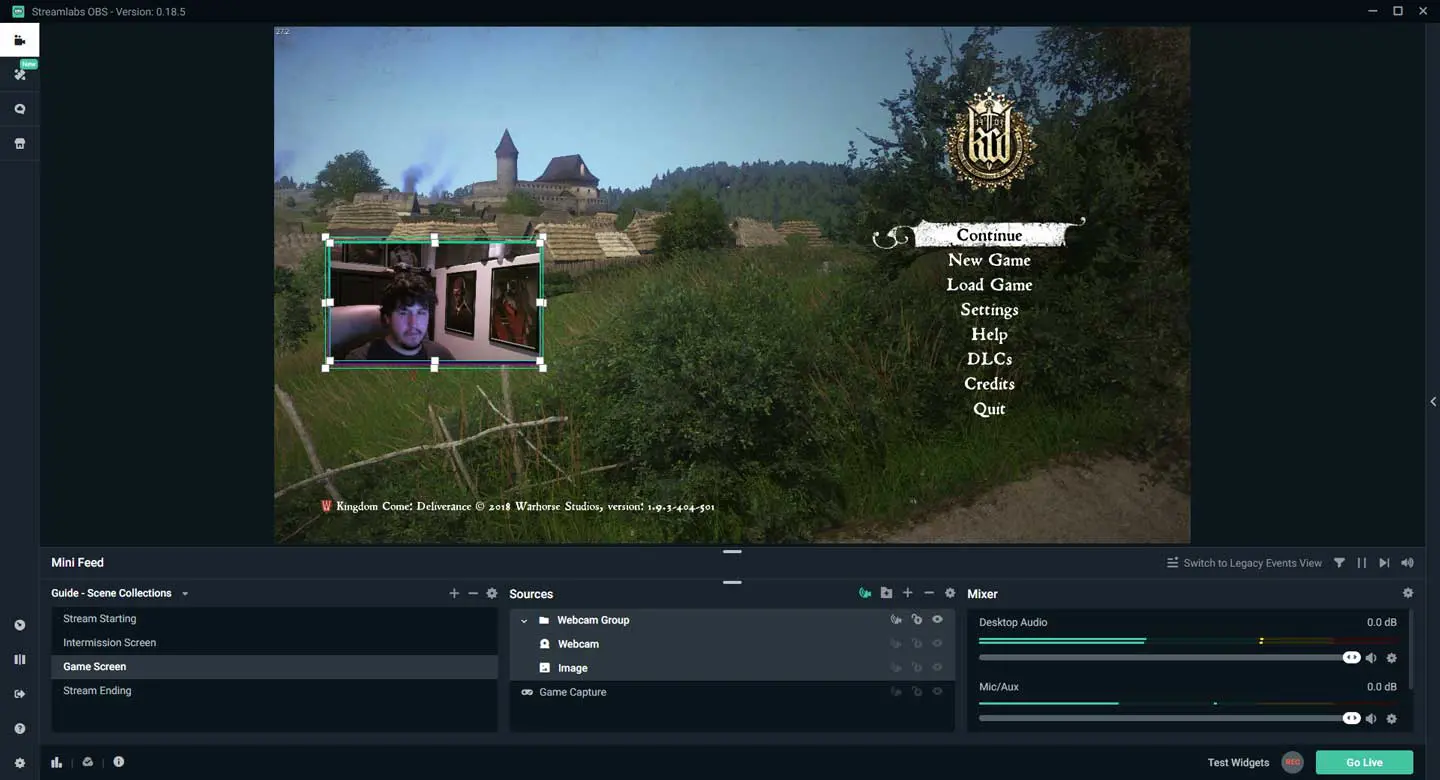 Make sure to add your webcam and webcam overlay in a group. There will come a time when you need to move it depending on what you are streaming.
To do this, create a group in your Sources section by clicking the Folder+ icon. Give it a name (ex. Webcam Group) and place this group over your Game Capture source. Make sure the group is above your Game Capture source. Drag your webcam source and border source into the group. You will need to make sure your overlay is above your webcam.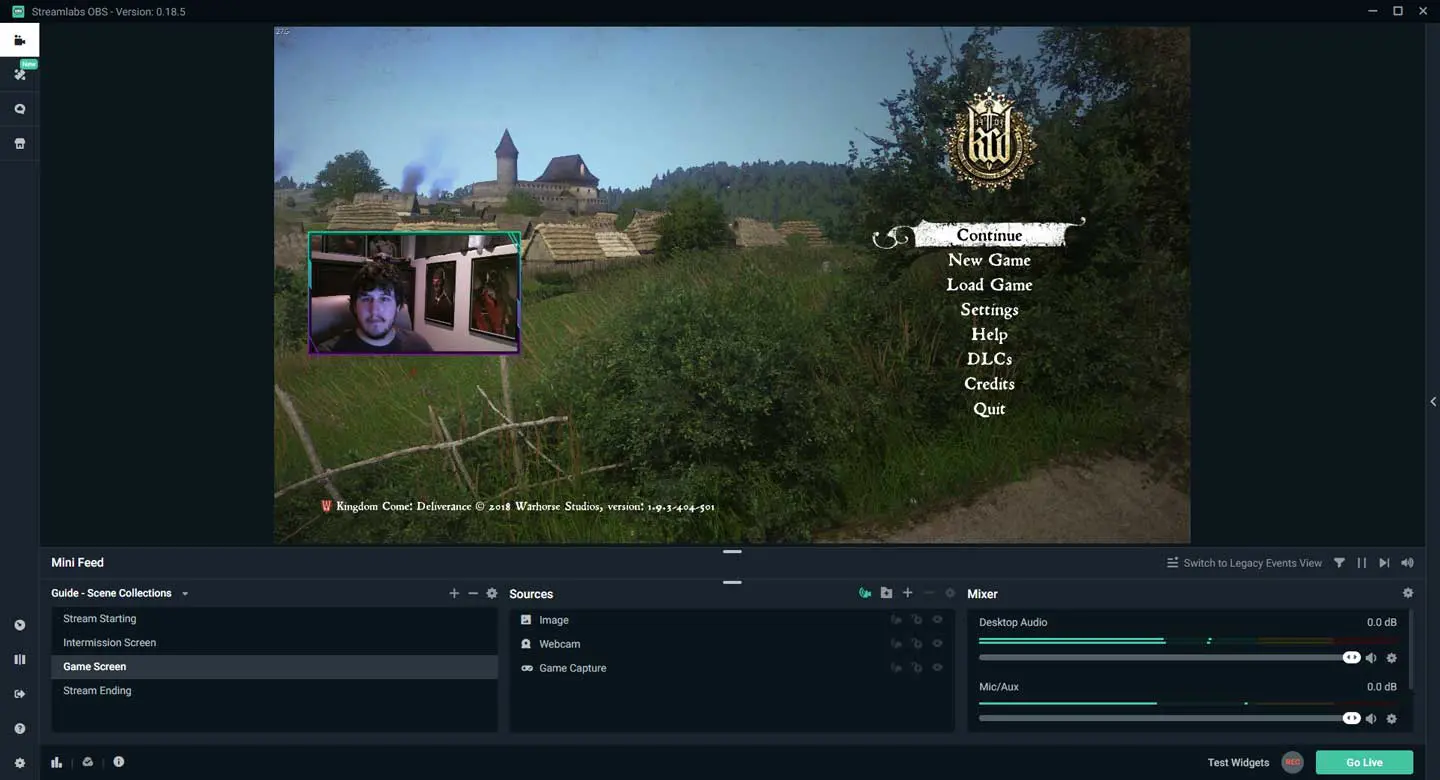 Grouping your items will let you scale them together. So if you ever need to adjust your webcam source, select the group, and it will all scale together.
You can also click and drag your files from your folder into Streamlabs OBS and it will properly create the sources for all of them.
In Conclusion
With everything that we covered on how to use Streamlabs OBS, you should be able to stream to your preferred streaming platform right away.

